There are few things in the world that trigger such ecstasy upon just thinking about it, and I think Tiramisu is one of those. The ardent aroma of coffee and liquor, the richness of Mascarpone cream and the softness of the sponge cake base – all mingled, intertwined – create a sensational, impeccable taste that lingers on your taste buds like no other.
Tiramisu is among the most frequent creations in my kitchen. The first reason is my love for the coffee smell, despite my body’s stubborn resistance to coffee absorption. So whenever my coffee crave arises, I would make a dessert that incorporates coffee – Tiramisu is always an ideal choice. The other reason is that Tiramisu is fairly easy and quick to make. If you don’t have a lot of free time to bake a cake base, then packaged ladyfingers are available at any grocery stores. The Mascarpone frosting only requires a few minutes of whipping. If I have a little more time, or am in the mood to indulge myself with something more special than usual, then a whole Tiramisu cake – like the one I shall be introducing below – hits all the right spots.

TIRAMISU CAKE RECIPE
INGREDIENTS
A. Cake layers
- 4 egg yolks (18 – 20 gram each)
- 20 gram (1-1/2 Tbsp) caster sugar
- 40 ml (3 Tbsp less 1 tsp) milk
- 30 ml (2 Tbsp) oil
- 1/2 tsp vanilla extract
- 50 gram (1/2 cup less 1-1/2 Tbsp) all-purpose flour
- 50 gram (1/3 cup) corn starch
- 4 egg whites (30 – 35g each) at room temperature
- Pinch of salt
- 1/4 tsp cream of tartar
- 70 gram (6 Tbsp) sugar – sifted
B. Coffee liquor syrup
- 40 ml (3 Tbsp less 1 tsp) dense coffee
- 20 ml (1-1/2 Tbsp) Rum
- 3 ml (1/2 tsp) vanilla extract
- 5 gram (1 tsp) sugar
C. Tiramisu filling and frosting
- 200 gram (7 oz.) Mascarpone cheese – at room temperature
- 70 gram (6 Tbsp) sugar
- 300 ml (1-1/4 Cup) whipping cream (35 – 40% fat) – refrigerated
- 15 ml (1 Tbsp) Rum
- 5 ml (1 tsp) vanilla extract
 Note:
Note:
– If you don’t have an oven, you can either bake the cake using the rice cooker recipe or substitute it with ladyfinger cookies.
– Mascarpone cheese can be replaced with cream cheese, the frosting would still taste great, there would just be a slightly tangy and salty flavor from cream cheese. Or if you absolutely can’t find either Mascarpone or cream cheese, whipping cream is an acceptable substitute. However, the frosting would be a little more liquid, and the significant Tiramisu flavor would be missing.
– Rum can be substituted with another sugar-based liquor, such as Marsala, Baileys, Kalua, etc. You can’t use wine or rice-based alcohol. If you don’t have any sweet liquor, just skip it.
– Sugar, especially in part B and C, should be grinded up finely. It’s best to use caster sugar or powder sugar.
INSTRUCTIONS
Detailed step-by-step instructions and notes can be found in the video in Savoury Days’ YouTube channel (don’t forget to sign up and subscribe to receive the latest notifications as soon as our videos come out). You can watch below or at this link.
The video has both English and Vietnamese subtitles, to view them, click on CC and select Language under Settings. And remember to select HD to view the video with the best definition and quality 
——-
PRINTABLE RECIPE
1. Prepare a Hong Kong style sponge cake or any sponge cakes of your preference. Bake in a 20 – 22 cm round tin. Let cool completely.
2. While waiting for the cake to cool, start making the Tiramisu filling/frosting:
– In a mixing bowl, combine Mascarpone and sugar. Beat at low speed in 1 – 2 minutes until the frosting is creamy and incorporated. Mascarpone needs to be at room temperature for the cream to turn out nicely smooth.
– Add cream, vanilla extract and liquor into the Mascarpone mixture. Whisk at high speed until the cream becomes more solid and billowy, then turn down to lowest speed.
– Whisk slowly and keep an eye on the cream. Stop as soon as the cream reaches a rather solid stage, if you take the whisk out of the cream, the peaks hold firmly, and when you tilt the bowl the cream doesn’t move. Avoid overbeating at this point, because overbeating causes the cream to be grainy and curdled.
– Refrigerate the entire bowl of cream for at least 30 minutes for the cream to set. It will be easier to decorate and the frosting will be neater as well.
3. Slice cake into 3 even round layers (see instructions on how to slice cakes in the video).
4. Assembling:
– Place the first cake layer on the cake stand. Tuck some overlapping strips of paper under the edges of the cake. This extra step keeps your cake platter clean: after you frost the cake, simply pull out the strips of papers and throw them away.
– Combine all ingredients in part B. Brush this coffee syrup over the top of the cake layer. Spread 1/4 of the frosting on top of this layer. Repeat these above steps with the second cake layer.
– For the last cake layer, after brushing it with coffee syrup, spread a small amount of frosting all over the cake. Then refrigerate the cake for at least 30 minutes for the cream to set before you frost the rest of the cake. This technique is called “crumb coating”, meaning creating a base for the actual frosting, which helps avoiding cake crumbs getting into the frosting for a smooth cake finish.
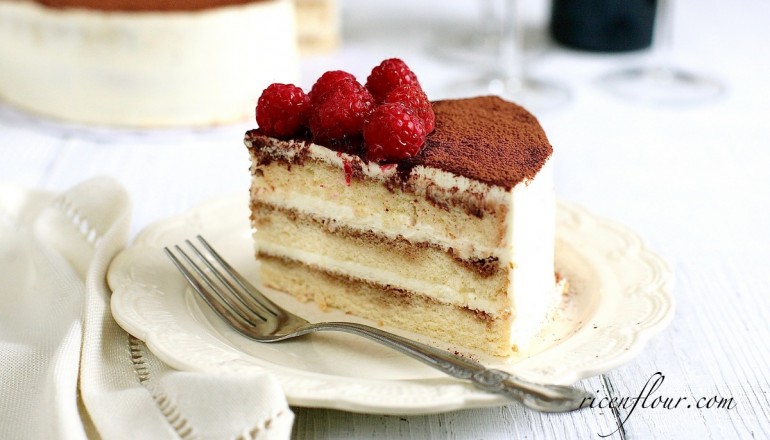
– Spread the rest of the frosting over the cake. Sprinkle cocoa powder, decorate it in any styles you’d like.
– Keep the cake refrigerated for up to 1 – 2 days. Sprinkle cocoa powder on the cake right before serving, otherwise the cocoa powder might get damp.
—————–
- Recipe & Photos: Linh Trang
- Written by: Holly Le
- Edited by: Holly Le


yesterday I made this cake and its such a winner. loved the taste and the texture. HOWever my cake did deflate from the top and the edges shrunk inwards. I used a fan forced oven and reduced the temperature by 5 degrees. NExt time I guess I wil reduce the temperature by another 5 degrees and bake a little longer.
Can I make the sponge cake with a 6 inch pan instead? What will be the new measurements for the spongecake and the tiramisu fillings?
Sponge tastes lovely. But it collapsed. Any idea what I could have done wrong?
Hi, you may want to check this post for the reason http://www.ricenflour.com/kitchen-hack/understanding-your-oven-a-must-to-bake-a-perfect-cake-or-bread/
Looks great. Tiramisu is so tasty. Thanks a lot.
Thanks for the great recipe and video tutorial! I really, really love that you have added exact measurements (grams) in your recipe!! Have to try the cake – it really looks beautiful and I am a huge tiramisu fan
Keep up the great work!
Ursula