
In this series of “How to make bread”, we would like to guide you through the whole procedure of making a loaf of bread from scratch. We introduce not only the basic steps, necessary techniques and skills (such as folding or proofing the dough), but also important notes (plus tips and tricks) to ensure you a success right at your first attempt.
We hope you find many takeaways from this series and May your bread always rise 
——————
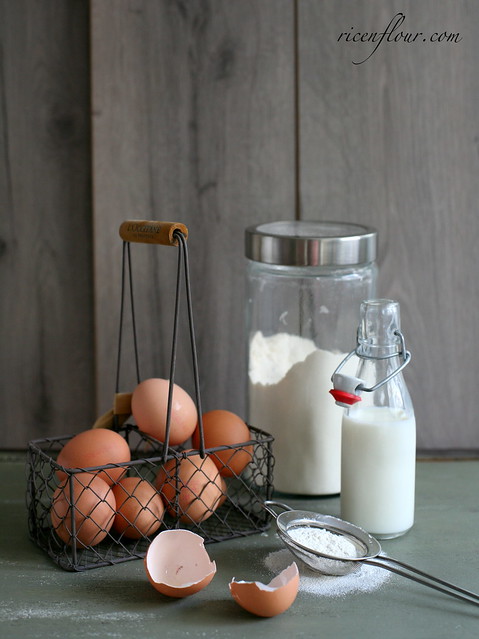
How to make bread 101 – Part I: Say “Hi!” to the Ingredients
Bread can be made from just the three basic ingredients, namely (wheat) flour, water and yeast. Wheat flour contains natural proteins. In their dry form, these proteins stay “silent”; but when interacting with water, they transform into gluten strands. Through the kneading process, these gluten strands become stronger and connect with each other to create a gum-like stretchy substance with thousands of little pockets that trap CO2 gas. When it is put into a hot oven, the high temperature makes this gas to expand, helping the dough to rise. At the same time, the heat also makes the gluten (i.e. protein) to be “cooked” and get hardened, solidifying the dough (and generating the texture of the bread). And, voilà, after some minutes baking, we have a well-risen loaf of bread with a soft texture that is filled with numerous tiny gas pockets.
For cakes, the gas bubbles that help with the leavening of dough come from chemical substances such as baking powder or baking soda. However, for bread, these gas bubbles are created by the activity of the yeast. Yeast (and its activity in the dough) and the gluten strands are the two most essential elements in bread making.
On the one hand, the work of yeast inside the dough not only creates air bubbles that make the dough rise, but also adds flavors to the bread. On the other hand, the gluten strands create a network that trap these air bubbles as well as form the texture of the bread. Thus, the basic steps to bread making are built for two main purposes, which are to control (1) the yeast activity, and (2) gluten formation and development. In short, to make a loaf of bread from scratch, normally we need to go through these following steps:
- Choosing and measuring ingredients
- Preparing the “starter” (optional)
- Mixing and kneading dough
- Proofing (first rise)
- Dough rest and shaping
- Proofing (second rise)
- Baking
- Cooling and storage
Step 1 – Choosing and measuring ingredients
 The three main and most important ingredients in bread making is flour, yeast and water. In addition, to make a varieties of sweet and soft bread (rich dough), we may need to include other ingredients such as eggs, milk, butter, oil, shortening, etc. … Each ingredient serves a different purpose. Not only do they contribute to the overall flavor of the bread, but they also affect the development of the gluten network and yeast activity. Thus, when using these ingredients, we need to follow certain rules:
- Wheat flour: Use the right type of flour as stated in the recipe. Flour that is used to make bread is named bread flour and usually has a high protein content (around 11 – 12.5%). This high protein content helps to form stronger and more elastic gluten strands. At the same time, high protein content also needs more water. Thus, when making bread, we need to be conscious of the protein content in flour and adjust the amount of water to be added accordingly. If bread flour is not available, you can use all-purpose flour; however, the water amount will need to be adjusted as all-purpose flour has a lower protein content as compared to bread flour. Also, the texture of bread made from all-purpose flour is less elastic than that made from bread flour.
- Water (or other liquid ingredients such as milk …): Liquid ingredient such as water or milk is important for the formation of the gluten network as well as yeast activation. Moreover, during the baking process, a portion of liquid evaporates into steam that aids in the expansion of bread. Because of these reasons, more liquid (high-hydration dough) is generally better than less.
In general, for bread flour with a protein content of 11 – 12%, liquid should be added with an amount around 50 – 65% that of flour. For example, with a 100 gram of flour, you need about 50 – 65 gram liquid in total (from water, milk, egg, etc. ). Some specific bread may ask for a higher liquid quantity, which may go up to about 70 – 80%. These bread usually has a moist texture with bigger air pockets, and is generally more flavorful. However, high hydration dough is very wet, sticky and thus, difficult to knead. So, it’s better for beginners to start with recipes with a normal ratio between liquid and flour (i.e., 55 – 65%).
Additionally, it should be noted that, the actual amount of liquid used in reality may not be exactly the same as what it is called for in the recipe because of reasons such as:
- Type of flour: Flour with higher protein content needs more water
- Age of flour: Older flour usually absorbs more water than fresh/ new flour
- Flour from different brands may have different water absorption capacity
- The room humidity, kneading techniques, etc.
Therefore, we want to be flexible when adding liquid (water, milk..) when making bread at home. If you are a beginner, a good way is to use 80 – 90% of the amount of liquid that is asked for in the recipe. Then during the kneading process, you can add more liquid if the dough is too dry. Generally, dough that has enough or a little bit more water is mushy, elastic, and pretty easy to be kneaded. In contrast, a dry dough is hard and quite difficult to be handled.
- Yeast: Different from baking soda (bicarb) or baking powder, yeast is a microorganism that releases enzymes which act as a catalyst in the process of fermentation, consumes sugar from the complex carbohydrates in flour and expels CO2 and alcohol as by-products. Alcohol evaporates during proofing and baking; whereas CO2 is trapped inside the gluten network and, thus, helping the dough rise.
Since yeast is alive microorganism, it reacts with heat:
- From 0 to 14˚C: Yeast stays dormant (0 – 1˚C is its storage temperature)
- From 15 to 20˚C: Yeast is active but weak and slow
- From 20 to 37˚C: ideal temperature for yeast
- From 38 to 59˚C: Yeast is active but weak because of high heat
- From 60˚C and above: Yeast dies
The 3 most frequently used types of yeast are:
- Fresh yeast/Compressed yeast: wet yeast, available in foil-wrapped form, and stored in refrigerator.
- Active dry yeast: large, brown granules. Active dry yeast always needs to be activated before use. How to activate yeast? Mix it with lukewarm water (32 to 38˚C) then wait for 10 – 15 minutes, the yeast will bloom and create a foamy, brown layer on top of the water. Adding some sugar (1/4 tsp sugar for 1-1/2 tsp yeast) accelerates this process.
- Instant yeast/Instant dry yeast/Rapid rise/Quick rise yeast: fine, brown granules that don’t need to be activated before use. They can be mixed straight into the flour. Instant yeast creates more air bubbles than active dry yeast; thus, with the same amount of flour, we can use a lesser amount of instant yeast as compared to active dry yeast.
activated yeast with milk
 As each type of yeast produces slightly different activity, it is best to use the right type that is called for in the recipe. If use a different kind, you will need to convert the amount accordingly:
- Multiply the amount of fresh yeast by 0.5 to get the amount needed for active dry yeast. For example, if the recipe calls for 10 gr of fresh yeast, the amount of dry yeast to be added will be: 10 x 0.5 = 5 gr
- Multiply the amount of fresh yeast by 0.35 to get the amount needed for instant yeast. For example, if the recipe calls for 10 gr of fresh yeast, the amount of instant dry yeast to be added will be: 10 x 0.35 = 3.5 gr
- Active dry yeast : instant yeast conversion is: 1 gr active dry yeast = 0.7 gr instant yeast.
Which type of yeast is best? It’s hard to compare. Professional bakery normally use fresh yeast, and hence, it is rumored among home bakers that fresh yeast produces a better flavor bread. However, I remember in a book by Peter Reinhardt, he suggests to use instant (dry) yeast because its effect is quite constant and fast.
The two main functions of yeast are: (1) a leavening agent and (2) a flavor builder. Similar to baking powder, the amount of yeast used depends upon the type of bread. It is not true that the more yeast used, the more risen the bread becomes. In reality, it can be the reverse. When too much yeast is added, it can create too much CO2 and alcohol, resulting in unfavorable sourness of the bread. Moreover, when there is too much gas inside the dough, during the baking process, bread will rise too quickly while the gluten strands don’t have enough time to harden. The consequence is: the bread collapses soon in the oven.
Aside from that, when making bread, it is suggested to use fresh (new) yeast (since it is live microorganisms, old or out-of-date yeast can be weakly active or dead) and store it in dry, well-ventilated place.
The most frequently used type of yeast in household, to my knowledge, is instant yeast. Even though this type of yeast doesn’t need to be activated in advance, to make sure it is viable, you can test by mixing it with lukewarm water (32 to 38˚C), then let rest for 10 min. If yeast is still active, it will rise into a foamy texture. This activated yeast (together with the liquid) is later on mixed with other ingredients.
Note that: (1) The liquid (water or milk) used to activate yeast should come from the amount of liquid stated in the recipe. (2) The temperature of the liquid that is used to activate yeast should not be too high. Ideally it is between 32 to 38˚C. If the liquid is too hot, the yeast will be weakened or killed. (3) A little bit of sugar helps boost the activation process.
If yeast doesn’t rise in this activation, it is either because the yeast is no longer viable or the water is too hot. In that case, you should discard the mixture and remake another one.
- Salt: is also a crucial ingredient in bread making. In addition to adding flavor to the bread, salt serves other two important functions: (1) strengthening the gluten network and (2) slowing down yeast activity. This may sound bad, but it is actually very important. Without salt, yeast can go into “hyperactive” mode, causing the dough to rise too quickly and gluten strands to be stretched too fast while they haven’t formed enough strength. This may affect the final texture of the bread. However, since salt is the “enemy” of yeast, when mixing ingredients, it is best to avoid direct contact between them. You can mix either salt or yeast first with flour or liquid, then add in the other.
- Next to the above mentioned ingredients, when making bread, especially the rich or enriched dough, you may need other ingredients such as sugar, eggs, milk, buttermilk, yogurt … Note that fat ( in the forms of oil, butter, margarine, shortening …) can damage the gluten strands and prevent the formation of gluten network. Hence, it is best to add ingredients containing fats (except egg yolks) when the dough has been kneaded for about 8 to 10 min. This gives time for gluten strands develop and strengthen before the fat gets in the way.
End of part 1. Other parts in this series:
- Part 2: “Starters” and How to knead bread dough
- Part 3: Proofing and Shaping bread dough
- Part 4: Baking and Storing bread
———————
Author: Trang & San


JOIN US