For a very long time I had been searching for a perfect recipe for this red velvet cupcake. Perfect inside out, i.e. look perfect and taste perfect.
The “look part” seems to be quite easy to achieve as sometimes I have a funny thought that as long as it is a Red Velvet Cake, it SHOULD BE pretty. Anyway, it can be even MORE pretty if the frosting is shiny and smooth, and holds its shape nicely (instead of being grainy and too thin that can even drip down the cake).
The “taste part” is more tricky to me. What I expected from a good red velvet cupcake are a rich and moist texture but still soft and fluffy. It should have a nice delicate chocolatey taste as well.
You can call me “Ms. Perfectionist”  Still I’m glad that I was very strict with this red velvet cake, otherwise, I could never find the recipe that I’m gonna share with you now. It’s the only one among the dozens of recipe that I tried, which could bring me my dreaming Red Velvet Cake. I have used this recipe for many occasions (parties, family gathering, birthday present, etc). It has never disappointed me and I do hope it will do so to you, too

RED VELVET CUPCAKE RECIPE
Yield: 10-12 cupcakes (depending on the cavity of your cupcake moulds)
Preparing time: 15 – 20 mins
Baking time: 25 – 30 mins
Ingredients
A. Red Velvet Cupcake
- 120 ml (1/2 C) milk
- 8 ml (1/2 Tbsp) lemon juice of vinegar
- 120 gram (1 C plus 1 tsp) all purpose flour
- ¼ tsp. baking powder
- ¼ tsp. salt
- 10 gram (1-1/2 Tbsp) natural unsweetened cocoa powder
- 60 gram (1/4 C plus 1 tsp) unsalted butter – softened at room temperature
- 90 gram (6-1/2 Tbsp) caster sugar
- 1 medium egg (60 gram including shell) – room temperature
- ½ tsp vanilla extract
- 15 ml (1 Tbsp) red food coloring
- ½ tsp baking soda
- ½ tsp vinegar
B. Cream cheese frosting
- 200 gram (7 oz.) cream cheese – softened at room temperature
- ½ tsp vanilla extract
- 40 gram (5 Tbsp) powdered sugar
- 150 ml (1/2 C plus 2 Tbsp) cold whipping cream (35 – 40% fat)

Instructions
A. Red Velvet Cupcakes
1. Preheat oven to 170°C/ 338°F. Line a muffin/ cupcake pan with paper cups.
2. Mix 8ml of vinegar with 120ml milk. Stir well and let sit for 10 -15 minutes before use, the milk will turns into a sour product that is very similar to buttermilk. (if you have buttermilk at hand, you can substitute this with 120 ml (1/2 cup) buttermilk).
3. Sieve the dry ingredients including: flour, baking powder, salt and cocoa powder, mix with a wire whisk.
4. Put butter into a bowl, beat for about 1 minute at medium-low speed until butter has been smooth. Set speed at medium-low, add the sugar, little at a time, mix well to incorporate sugar into butter before adding extra sugar. This helps butter to be fluffier.
When all of the sugar has been incorporated into the butter, raise speed to highest and beat until the butter becomes fluffy and turns very pale. It may take 5 – 8 minutes to beat butter depending on your mixer’s power. Note that the fluffier the butter is, the fluffier and softer the cake will be. While beating, stop the mixer regularly to scrape butter and sugar down from the side of the bowl.
5. Add egg and vanilla into the bowl of butter, blend very well.
6. Add the red food color into the buttermilk mixture from step (2) and stir well. Use at least 10 ml food color to achieve the desired color. Gel color is not recommended.
7. Divide the dry ingredients (from step 3) into 4 parts, the wet ingredient (milk mixture) into 3 parts. Add ¼ of the dry ingredients and 1/3 of the wet into the butter mixture, beat at low speed. Add in the next ¼ flour and 1/3 milk into the bowl. Do the same thing with the remaining part (the last portion of ingredient to be mixed in is the dry ingredient). Note: beat at low speed and beat until the ingredients are just incorporated. Don’t over-beat the ingredients as it will make the cake dense and heavy.
8. In a separate bowl, mix the baking soda and vinegar. The mixture will bubble. As soon as it stops, add this mixture into the cake batter and quickly mix.
9. Spoon the batter into the pan. You can scoop the batter with 2 spoons or you can simply put it into a piping bag and pipe the batter into the moulds.
10. Bake at 170°C/ 338°F for 25-30 minutes. Check by inserting a toothpick into the center. If it comes out clean, the cakes are done. Also, the cake top should be springy to the touch when slightly pressed.
Take the cupcakes out of the pan and leave on a rack to cool completely.
B. Cream cheese frosting:
1. Add the cream cheese into a bowl. At low speed, beat for 30-45 seconds for the cream cheese to blend (cream cheese should have been softened at room temperature). Add in the sugar and vanilla extract and beat for 30 seconds.
2. Add whipping cream into the bowl of cream cheese. Whip at high speed until the cream gets thicken and has almost soft peak. Reduce speed to lowest and continue whipping until the cream is thick and reaches stiff peak. Keep an eye on the cream in the last minutes to not over-whip it (if over-whipped, the cream will turn grainy).
3. Put this cream cheese frosting into a piping bag and place it in the fridge for at least 30 minutes for the frosting to set. This allows a better-structured frosting.
C. Assembly
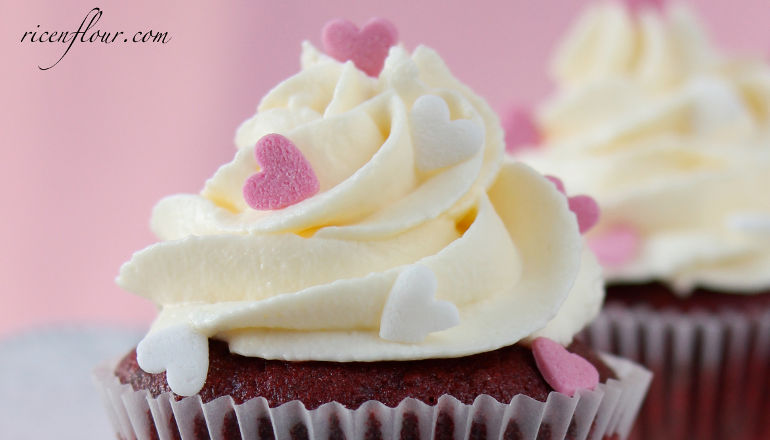
When the cupcakes and the frosting are cool, start piping. I used a star tip (Wilton 1M but 2D is also fine) to pipe the frosting onto the cupcakes. Keep the piping bag upright (creating a 90° angle and 3-4 mm above the surface of the cupcake). Gently swirl the bag in an inward motion as you wish. Top the cupcakes with confectioners’ hearts or cupcake toppers.
Store these cupcakes in a very cool and dry place, or keep them in air-tight boxes then store in the fridge in 1 – 2 days (for me, these cupcakes taste much better after 1 day in the fridge, when the cake has absorbed the moist from the cream).


JOIN US