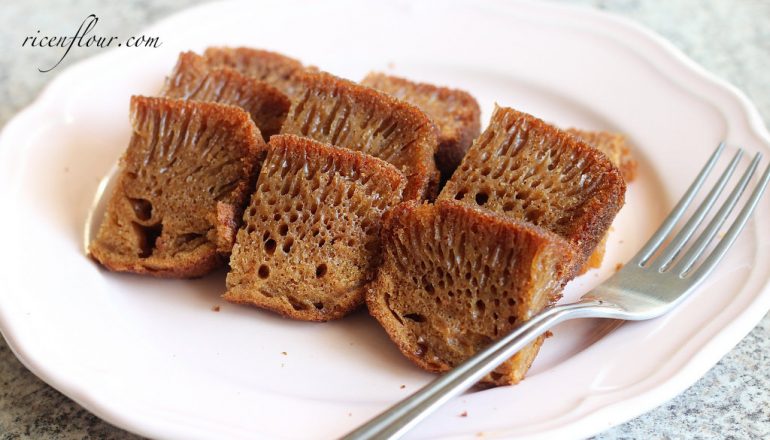
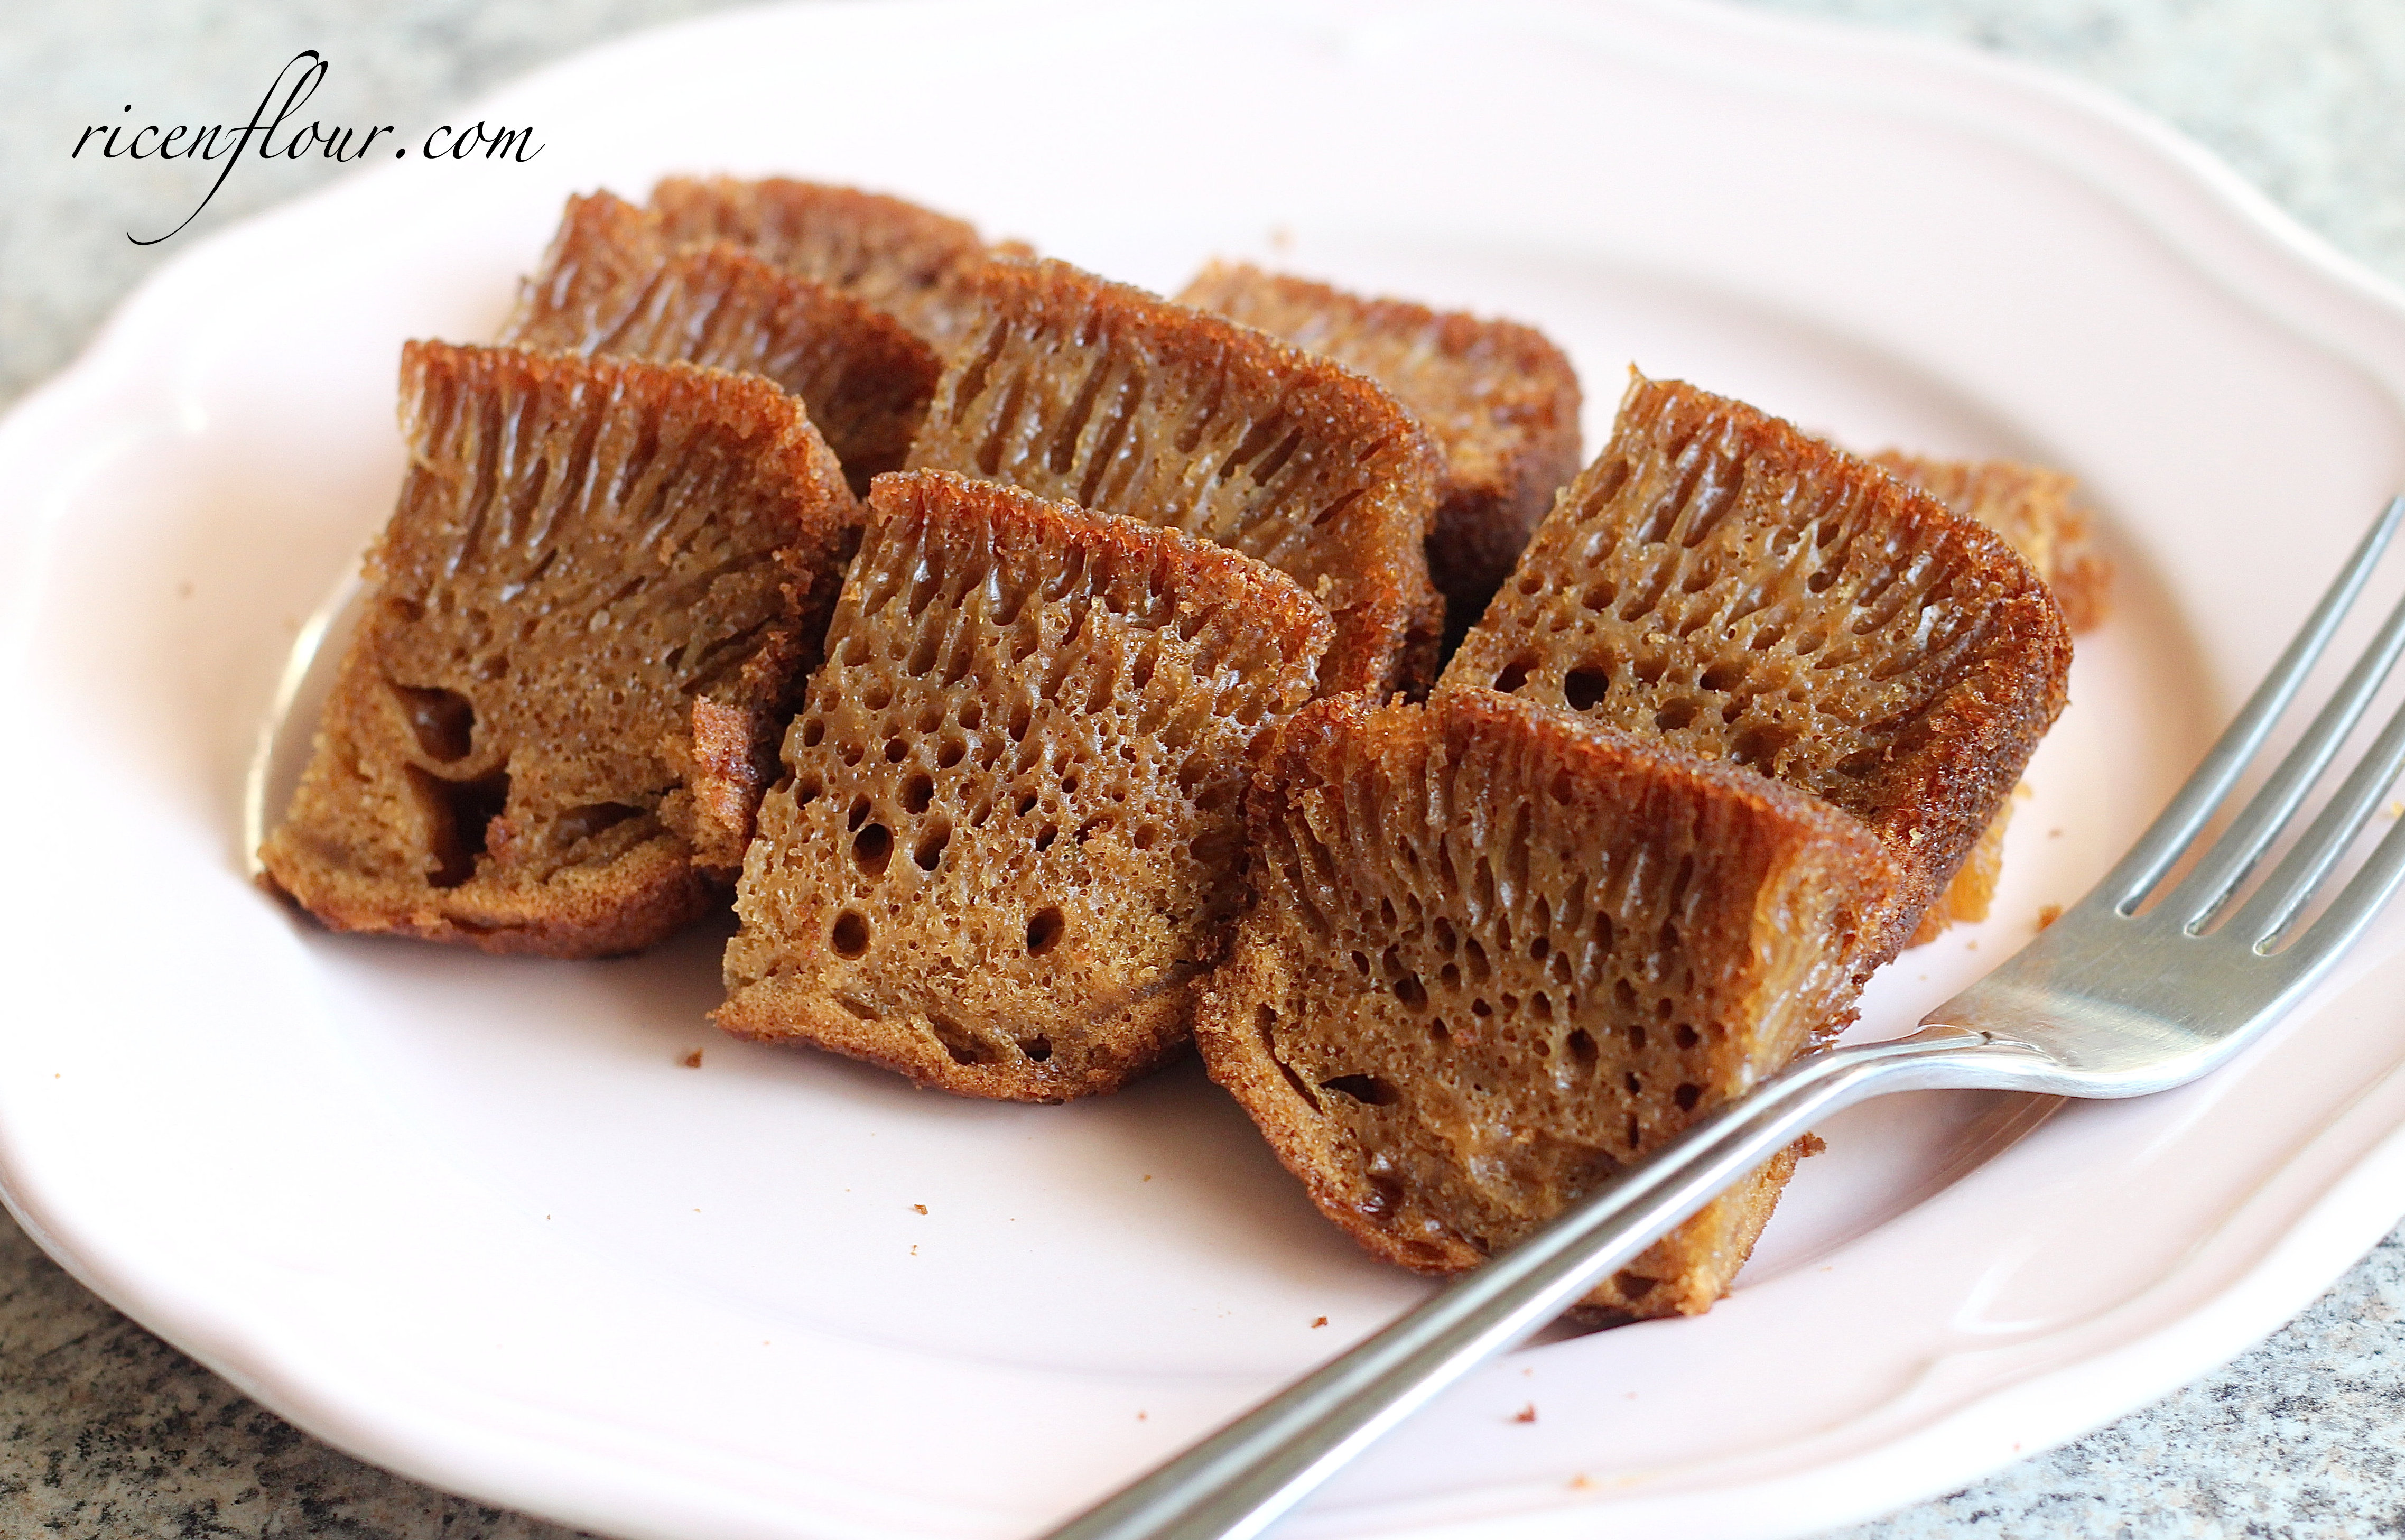
I am always on the quest to look for a new tea time treat. This week’s treat is Malaysian honeycomb cake (kek sarang semut), which takes its name from its beehive-like interior, full of little air pockets. The caramel toffee flavour and the spongy, airy texture sure makes this cake a lovely afternoon delight.
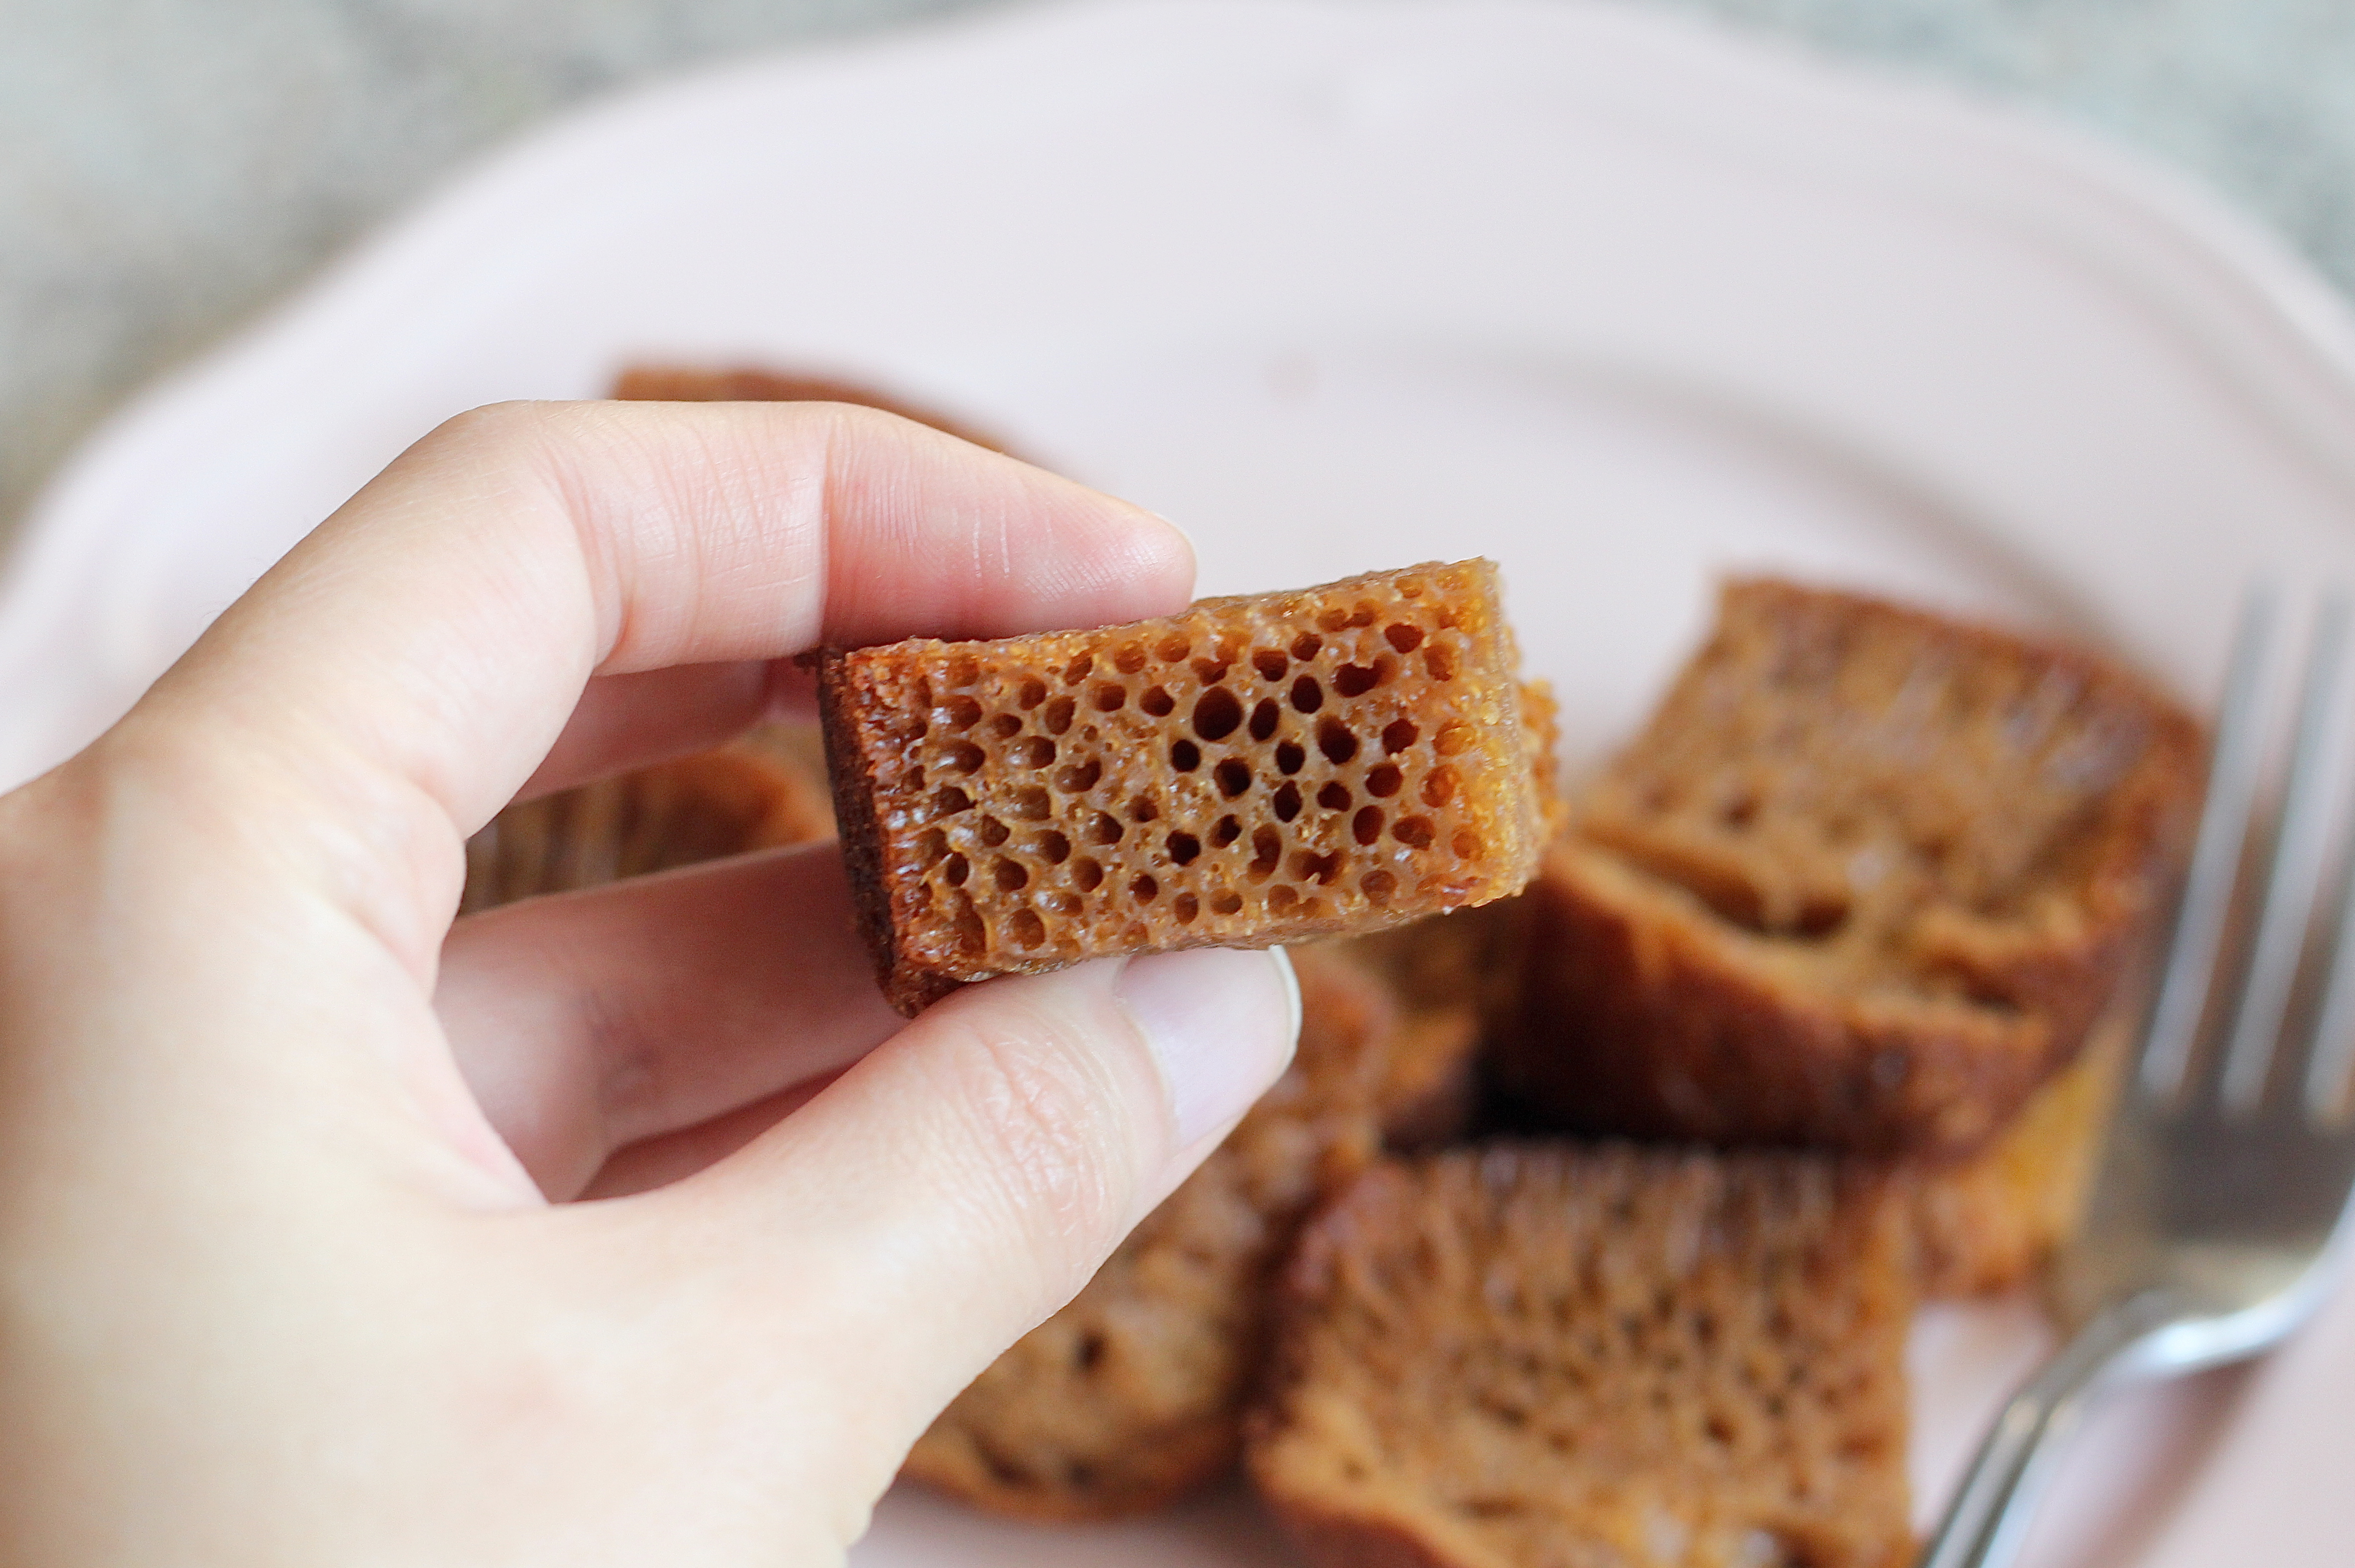
The beehive interior of the cake
Malaysian honeycomb cake has a sister – who is Vietnamese honeycomb cake (bánh bò) – click the link for the recipe if you fancy another ‘fun cake of the week’ recipe. The most significant difference between the Malaysian and the Vietnamese honeycomb cake is that while the Vietnamese cake has a coconut-y flavour, the Malaysian one has a more toffee and caramel-y taste, due to the sweetened condensed milk and the caramelised sugar. However, in this recipe, I substitute the caramelised sugar with brown sugar instead, and please forgive me for my afternoon laziness  The brown sugar will not noticeably alter the taste of the cake, and will probably make your life a little bit easier if you are not familiar with making caramel, since there is a risk of burning the sugar which would result in your cake tasting bitter.
Malaysian Honeycomb Cake (Kek Sarang Semut) (recipe)
EQUIPMENT: 1 20 cm round cake tin, or 18 x 18 cm square tin
INGREDIENTS
- 100 grams (1/2 cup less 1 tbsp) unsalted butter
- 180 grams (1/2 can) sweetened condensed milk
- 240 ml (1 cup) water
- 150 grams (3/4 cup) brown sugar
- 4 eggs (about 60 grams/egg with shell)
- 130 grams (1 cup) all purpose flour
- 10 grams (2 tsps) baking soda
* Note:
– Butter is definitely more highly recommended than margarine, especially in this recipe.
– You can substitute brown sugar with ¾ cup (180 ml) golden syrup and also reduce the water to 200 ml.
INSTRUCTION
1. Add the butter, condensed milk and water into a saucepan. Put the saucepan on high heat and keep stirring until the butter has melted and the sugar has dissolved. Take the saucepan off the heat and leave to cool. Don’t cook the mixture for too long because you don’t want all the water and moisture to evaporate, which can affect the texture of the cake.
2. Beat the eggs in another bowl. Add 1/3 of the mixture in step 1 into the beaten eggs. Sieve the flour into the bowl, whisk well until all the flour is incorporated and there are no lumps. If the mixture is too thick at this point, add a little bit of the melted butter into the bowl.
When all the white streak of flour has disappeared, slowly pour the rest of the mixture in step 1 into the bowl while simultaneously whisking the batter. Keep whisking until all the ingredients are well incorporated. Leave the batter to rest for about 15 minutes.
Preheat the oven at 190°C / 375°F. Prepare a cake tin, ideally metal or silicon. For this cake, you don’t need to grease the tin, however, you can line the bottom of the tin with a piece of greaseproof paper so that the cake can be taken out more easily after being cooked.
3. After 15 minutes of rest, sieve the baking soda into the batter and mix well. Pour the batter through a sieve and into the cake tin.
4. Place your cake tin on the 4th rack of a 5-rack oven, or on the bottom rack of a 3-rack oven. Bake the cake at 180°C / 356°F for 20 minutes. When the cake has risen and the surface has cracked a little bit and turned a dark golden brown colour, reduce the heat to 160°C / 320°F, and bake for further 20 – 25 minutes.
The cake is done when it springs back to touch, a skewer in the middle comes out clean, and the cake doesn’t collapse when you open the oven.
If the top of the cake turns brown too quickly, you can cover the surface with a piece of foil.
5. Leave the cake to cool in the tin. Take the cake out by running a knife along the side of the tin.
The cake is best served fresh within the day. If there is another leftover cake, store it in an airtight container in a cool and dry place. Don’t leave it in the fridge, as the cake may harden the next days.
* Useful notes:
– In step 2 of the recipe, I use a hand mixer on the lowest speed setting to mix the batter. You can definitely mix the batter by hand using a whisk, but I think that a hand mixer would help to incorporate the flour better and more evenly, without leaving any lumps. The speed of the hand mixer would also help to incorporate air bubbles into the batter and assist the gluten development – which results in the signature squishy and airy texture of the Malaysian honeycomb cake.
– I have read some bloggers who said that the longer you leave the batter to rest, the more airy the interior of the cake will be. However, I find that 15 minutes is sufficient.
– The reason why baking soda is added last is so that it remains ‘fresh’ and is activated right at the time the cake is baked, helping the cake to rise better. I sieve the baking soda so that there won’t be any lumps of saltiness in the cake – if you can still taste the soda in your cake, reduce the amount of baking soda to ¼ tsp the next time you make it.
– A fairly common problem in making honeycomb cake is that there is no ‘honeycomb’ at all, but only a very dense cake. There can be several reasons and potential troubleshoots:
- If the cake rises very quickly and then deflates just as fast, the heat of the oven may be too high.
- If the cake only rises marginally, and tastes rather eggy, the heat of the oven may be too low. Also, the baking soda which has been exposed to air and thus lost its potency can also be a problem, if you can taste the salty soda in the cake after baking.
Have a great afternoon treat !
- Recipe by: Linh Trang
- Written by: Thao Dan


JOIN US