Before, I wasn’t so interested in whole wheat bread. I always had an impression that even though it is tasty, its texture is so dense and wet, sometimes even a little hard. Hence, with an “Asian tongue” that mainly favours breads with soft and tender texture, I found it difficult to “fall in love” with these whole wheat varieties. That’s also the reason why even though I have heard a loooot about whole wheat’s health benefits; I was quite hesitant about making them at home.
Then there was an event that changed my mind totally: the baking course at Le Cordon Bleu Paris. Among the breads that we made during the course, there were quite many made of whole wheat flour. Compared to regular milky rolls that made of white wheat flour, the texture of these whole wheat varieties is definitely not less fluffy and soft. And there taste was truly deeply amazing. Since then, I started to try baking whole wheat bread at home. And after several trials including the use of a bread maker, whole wheat bread was such a huge discovery for me; it’s like I just found a whole new “horizon” in my baking world.
What’s the difference between whole wheat bread and white bread? If you do a search on Google, you will probably find several 50-something pages of explanation! In a nutshell, white flour is made from wheat that has been processed, milled and refined (bran removed); whereas whole wheat flour is less processed and is derived from the complete wheat kernel (similar to white rice which has gone through refining process versus brown rice that is less processed).
whole wheat flour

Because of the little processing that it has gone through, whole wheat flour retains the bran and the germ, which contain much more fibre, minerals and other nutrients. Thus, it has a higher nutritional profile as compared to white flour. With the same flour quantity, the content of vitamin B, fibre, iron, calcium… in whole wheat flour is about twice as much as that in white flour. Thus, products made from whole wheat flour are not only good for our health, but also provide more energy. Also, thanks to this, compared to white bread, we need a smaller piece of whole wheat bread to fill our stomach, so it’s good for our belly size as well 
However, because it contains those parts of the wheat, whole wheat flour is more difficult to handle when used in cakes and bread. We know that protein, when interacting with water, will form gluten strands. During baking, these strands harden and provide the final texture for bread and cakes. Gluten in cakes is generally soft; whereas gluten in bread is much stronger and more elastic. The bran and germ in whole wheat flour are actually gluten’s “enemies”. Because these components have sharp ends, they will cut through the gluten strands, resulting in a more difficult kneading process and a weaker gluten network. That’s why, when working with whole wheat flour, if not handled well; the resulting product may have a dense, wet texture instead of soft and fluffy like regular white bread.
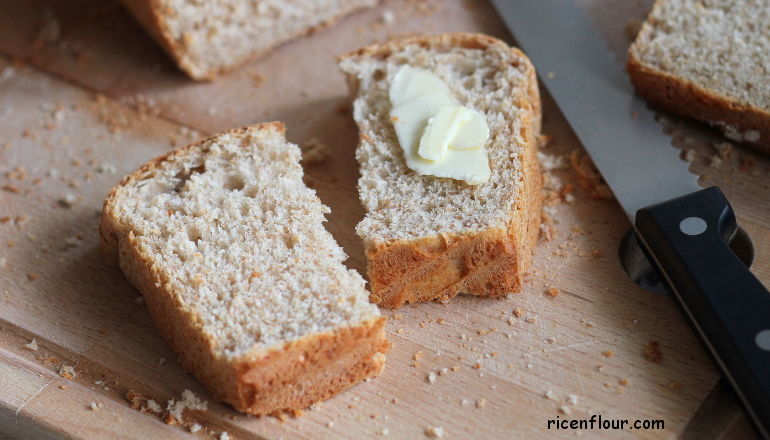
But don’t worry, the above situation only happens when we don’t know the right way and the right recipe to make whole wheat bread. Once we do, it’s totally possible to make soft fluffy bread from whole wheat flour. And after that, I believe most of us will not want to go back to the regular white bread anymore. Its taste is just so incredible, with a hint of sweetness and rustic, nutty flavor. With a little dab of butter, whole wheat bread is already, oh, so satisfying because in every bite you take, you can taste so fully the flavor of the wheat. Not only that, whole wheat bread is also good for controlling weight and regulating blood sugar. For bread addicts, this whole wheat variety is a good solution – I do think so

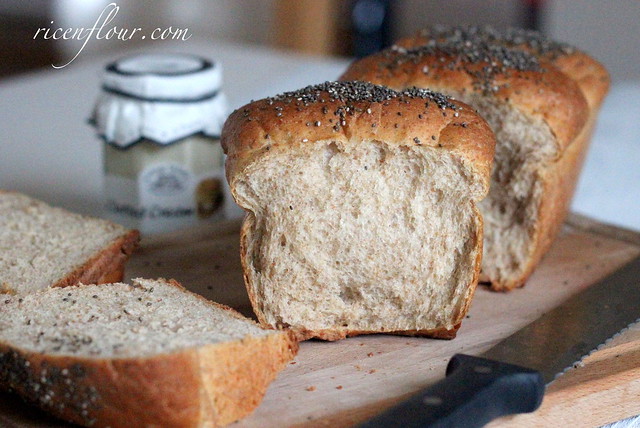
For this type of bread, I usually use 2 recipes: 1 for bread maker and 1 for hand/machine kneading and oven-baked. In this post, I would like to introduce the recipe for 50% whole wheat honey bread, for the home bakers who don’t own a bread maker. In a later post, I will introduce the recipe for 100% whole wheat bread which requires a bread maker (The difference between the 2 will also be explained in the latter post).
TOOL: 1 loaf pan, 25cm in length, 7cm in width, and 5cm in height
INGREDIENTS
- 150 gram (1 C + 2 Tbsp) bread flour
- 150 gram (1 C + 2 Tbsp) whole wheat flour
- 10 gram (1 Tbsp) dry powdered milk – optional
- 5 gram (1 tsp) salt
- 5 gram (1-1/2 tsp) instant dry yeast
- 35 gram (2 Tbsp minus 1 tsp) honey
- 200 – 220 ml (1 C minus 1 Tbsp) water
- 20 gram (1-1/3 Tbsp) unsalted butter – soft, not melted
- 20 gram (2 Tbsp) chia seeds or sesame seeds – optional
 Notes:
– Bread flour can be substituted by all-purpose flour, with an adjusted amount of water (all purpose flour may need less water than bread flour).
– Dry powdered milk is optional but helps to make bread tastier.
– Butter is recommended as it does add flavor to the bread.
METHOD
1. In a big bowl, mix in bread flour, whole wheat flour, dry milk powder, and salt.
 2. Add in the yeast and mix well.
 NOTE: As I used instant dry yeast, there is no need to activate it before use. If you don’t use instant yeast, or you do use instant yeast but want to make sure it is working, you can activate it by doing the following:
- Heat up ~40ml water (taken from the amount of water asked in the recipe) so that its temperature reaches about 35 – 40˚C/ 95 – 105˚F (must not go any higher, or yeast will weaken/die). Add in the yeast and mix well. After 5 – 10 min, the yeast mixture should bubble up and rise. If it doesn’t, there are two possibilities, either the yeast has problem (die, expired…) or the hot water kills the yeast. In any case, discard and remake a new batch.
3. Make a well in the middle of the flour bowl.
 4. Add in honey and water. Use a wooden spoon or any type of hard spoon to mix in a circular motion from the middle.
 5. Mix until everything blends into a lumpy dough.
 6. Use a damp towel or plastic wrap, cover the bowl and let the dough sit for ~20 min. This gives time for the gluten strands to form, makes the dough less wet, and thus makes it easier for us to knead by hand.
7. After 20 min, start kneading. Hand kneading is OK but a mixing machine is recommended as the dough is rather wet and sticky.
– If hand kneading, you can come over to my How to make Hokkaido milk bread video for instructions and tips.
– If using a mixing machine, it’s better to use one with a minimum power of 300 W. Start with low speed for 3 – 5 min, then gradually increase to medium speed. I used a hand mixer with 500 W power. After 5 min at 2/5 speed, the dough got smoother as seen in the picture below.
 Then I increased the speed to 3/5 and knead for another 5 – 7 min, the dough became smoother and more elastic, could be stretched quite easily as follow:

 8. At this stage, add in butter and continue kneading. As butter can damage the gluten strands, it is best to add it to the dough when the gluten strands have formed and became quite strong.
 9. Knead for another 5 – 7 min at low speed until the dough turns very smooth, strong, elastic, and can be stretched thinly without breaking.
 Important notes:
– As flour may have different water absorption capacity, there isn’t a precise amount of water in the recipe. It can vary around 65 – 75% of the total amount of flour (i.e., 200 – 200ml water for 300gr flour). You can start with 200ml water, and add in extra if needed.
– It is important to have enough water so that the dough always stays soft, elastic, and stretchable (a dry dough is heavy when held and hard to knead). Bread with enough moisture will have a soft texture and remain soft even after several days. Again, you can come over to my How to make Hokkaido milk bread video for visual reference as to how the dough should look like after kneading.
– HOWEVER, it should be noted that more water is not always desirable because when too much water is added; the inside of bread cannot be thoroughly baked, resulting in a dense and soggy product.
10. After kneading, shape the dough into a smooth ball (refer to above link on making Hokkaido bread for visual reference).
 11. Place the dough in a bowl and cover with a damp cloth or plastic wrap.
 12. Let the dough proof until it has doubled in size (proofing time varies depending on proofing temperature, warm temperature at 32 – 38˚C/ 90 – 100˚F helps dough to rise faster; the colder it is, the slower the proofing process).
 13. When the dough has proofed enough, gently press it to let some of the air out. Knead for 2 – 3 min to “relax” the gluten strands.
 14. Prepare the baking pan. If it is NOT non-stick, brush the surface with a thin layer of oil or butter.
15. Gently sprinkle some flour onto your work station. Shape the dough into a rectangular shape (it’s better to use hand rather than rolling pin), let rest for 3 – 5min.

Continue shaping it into a rectangular shape that has the length similar to that of the baking pan.

Roll the rectangular dough into loaf-shaped.

16. Put it into the baking pan.

You can also shape the dough similar to that in How to make Hokkaido milk bread video to yield a 4-piece loaf as seen in picture.

17. Let proof for 2nd time till it rises to 80-90%:

– If the weather is warm, you can cover the bowl with a damp cloth or plastic wrap and let it proof at room temperature. However, we need to pay attention to prevent the dough from rising too high and sticking to the cloth/plastic wrap. This can deflate the dough once taken out.
– If it is cold, you can let it proof in the oven that is already heated up to 50˚C (~ 3min) and turned off. Put the pan into the oven, besides a cup of boiling water. The water will prevent the dough surface from drying out. The oven’s temperature should vary between 32 – 38˚C/ 90 – 100˚F and cannot go any further as it can weaker or kill the yeast.
18. Once the dough has risen to 75 – 70%, pre-heat the oven at 180˚C/ 356˚F (top and bottom heat). If oven-proofing, take the dough out.
When the oven is ready and the second proofing has completed, gently brush some water onto the dough surface and sprinkle some chia seeds/sesame seeds if using any. Roasted sesame seeds add extra flavor to the bread; while chia seeds are full of nutrients and also offers an interesting mouthfeel.

19. Place the pan into the oven. Spray some water onto the walls of the oven and the space inside. Bake at 180˚C/ 356˚F.

20. After about 20 min, rotate the pan to help the bread get even distribution of heat. Then decrease the temperature to 170 – 175˚C/ 338 – 347˚F and bake for another 15 – 20 min. If the top of the bread turns dark, cover it with aluminum foil.
21. Once done, take the bread out of pan and let cool on the rack. You can brush some butter or cream onto the top of the bread while it is still hot to give fuller flavor. Wait till it completely cools down before cutting; or else the inside will get wet and soggy.

Leftover bread needs to be wrapped tightly and stored in a well-ventilated area. Use within 2 days. Before consumption, you can also spray it with some water and bake again in oven at 170˚C/ 338˚F for 5 min until the crust becomes crispy again. Bread will have a crispy crust and soft crumb. However, the bread should not be in the hot oven for too long as well as this process cannot be repeated for too many times because the bread will dry out.


JOIN US