Now that you have known the basics of traditional Vietnamese mooncakes (if you haven’t, check out the recipes for baked mooncakes here and snow-skin mooncakes here), it is time to get creative.
I love old-school and traditional styles when it comes to food, but there is always room for improvement for everything in life. To be honest, I was not a big fan of traditional Vietnamese snow-skin mooncakes and would rather stick to baked mooncakes, just because the store-bought ones are too sweet for my liking: the sticky rice dough would always have too much added sugar so that the mooncakes can be longer preserved. I am a great dessert fan – I am very convinced that I have a second stomach designed especially for desserts, but I would frown at extremely sugary, one-dimensional treats. Therefore, creating traditional snow-skin mooncakes at home, which allows me to adjust the level of sweetness to my liking, is a great hit; but I thought, why stop there?
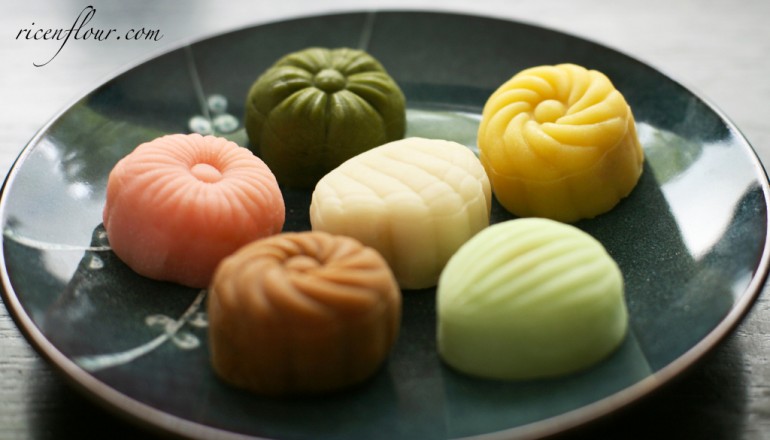
This mooncake recipe of mine is sort of a fusion between traditional Vietnamese snow-skin mooncakes and Singaporean snow-skin mooncakes. I adore the petite shape and colourful exteriors of Singaporean snow-skin mooncakes, but I also love the chewiness of Vietnamese snow-skin mooncakes, and after many trials and errors, these lovely babies were born.
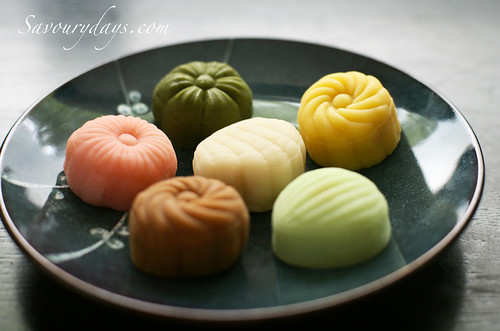
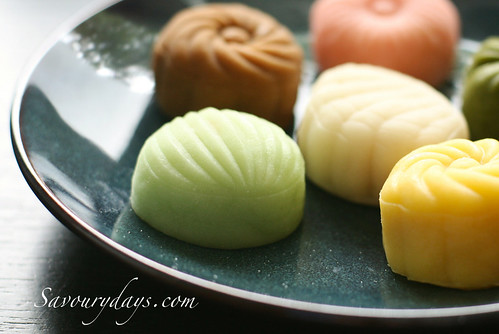
With this type of ‘hybrid’ mooncakes, you can have so many experiments with the colours and flavours (scroll till the end of this recipe for some useful tips and tricks on incorporating different flavours into the mooncakes skin dough). Sometimes, I would make matcha or coffee ‘mochi mooncakes’ by just shaping the dough without any fillings inside, and because these ‘mooncakes’ are technically not very traditional and super easy to make, I can have them all year round instead of just limiting myself to Mid-Autumn Festival ^v^
The only down side to this type of mooncakes is that their storage life is rather short, maximum 4 days in the fridge, as the dough will harden over time, and they need to be kept refrigerated. You can store them in the freezer for a longer period of time, but I usually prefer to make enough mooncakes for 1 – 2 days only and finish them all at once, since they are so easy to whip up anyway.
Snow-skin Mooncakes recipe without shortening
INGREDIENTS
- 50 grams sugar
- 150 ml boiling water
- 15 – 25 grams cooking oil (peanut or coconut oil is recommended)
- pomelo essence (optional)
- 100 grams cooked glutinous rice flour (for explanations on cooked glutinous rice flour, check out this recipe)
INSTRUCTION
1. Add sugar to a large bowl. Add boiling water and stir well to dissolve the sugar completely. Set aside to cool down. Feel free to add more sugar to your taste. Please note that this recipe is different from the traditional Vietnamese snow-skin mooncakes, hence, the simple syrup in the traditional recipe cannot be used as a replacement.
2. When the syrup is completely cool, add oil and pomelo essence (optional) into the syrup and stir well.
3. Divide the flour into 3 portions. Add the first portion to the bowl of syrup and stir well with a whisk. Lumps may form but not to worry, they will disappear when you finish mixing the dough.
4. Add the second portion to the bowl and stir well. Then you will have a smooth and elastic ball of dough.
5. Add more flour to the bowl, a tablespoon at a time. Stir well until everything is combined before adding more flour. Don’t add too much flour at once since lumps will form and affect the smoothness of the dough.
Please note that you may not need to use up all the flour. Since the water absorption level of the rice flour may vary, you can stop adding flour when the dough is very firm and elastic and difficult to mix further (I only use half of the third portion), or add flour than prescribed in this recipe.
The remaining flour can be used for dusting. Remember to mix only until the dough is ready and everything is combined. Don’t over-mix or knead too much: if the dough becomes too elastic, it will be difficult to shape and mould the mooncakes.
Visual instruction on how to mix the dough, as well as the desired consistency of the finished dough can be seen in this video. If you are unable to watch the video below, you can also view it at this link.
6. Wrap the dough carefully and let it rest for 10 – 15 minutes before shaping and moulding the mooncakes. Instructions on how to wrap and mould snow-skin mooncakes can be found in the recipe for traditional Vietnamese snow-skin mooncakes.
* Note:
- In my opinion, soft snow-skin mooncakes go well with soft fillings such as mung beans or taro, plus there is no difficulty in moulding these cakes. However, feel free to make any fillings of choice, or even no fillings at all. The cakes with fillings will be firmer and the mould patterns will likely stay longer on the mooncakes than those without. It’s recommended to use smaller-cavity moulds for no-filling mooncakes.
- The ratio of skin dough to filling for snow-skin mooncakes is usually 2:1, that is, the skin amounts to 2/3 and the filling amounts to 1/3 of the total weight of the cake. For example, a 75 gram cake calls for 50 gram skin dough and 25 gram filling. The recipe yields 300 – 335 gram skin dough. It’s recommended to shape and mould a small number of mooncakes before moving on to the rest of the dough, instead of working with all of the dough at once; because the longer the dough sits and rests, the more difficult it is to mould the cakes and for the patterns to stay on the mooncakes.
- The dough is very sticky, thus wearing plastic or latex gloves while working with the dough will make your life much easier.
- Remember to dust the mould and the cake ball before moulding. Sprinkle some flour onto your working surface, roll the cake ball onto it and dust off any excess flour on the cake. Quickly put the cake ball into the mould before the flour coating is absorbed into the skin, and then take it out.
7. The cakes should be kept in an airtight box and refrigerated at least 1 hour before serving, or best overnight, as they get chewier and tastier. It’s best to be served the mooncakes within 4 days since the skin will harden overtime. If you want to keep the mooncakes for a longer period of time, they can be wrapped and kept in the freezer. Just defrost the cakes in the fridge before serving.
8. If you want to try out different flavours of mooncake skin, substitute the water in the recipe with juice or any flavoured water. Fresh juice from fruits or vegetables should be boiled and left to cool completely before you use it in the recipe. You can also add dry powder such as matcha or cocoa powder into the rice flour.
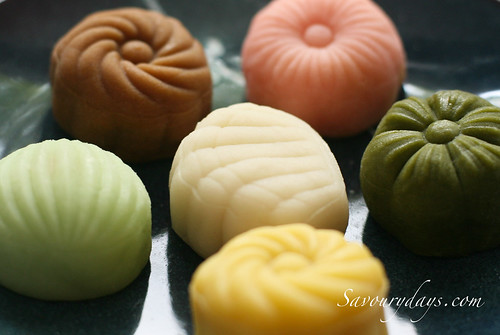
Here are a few suggestions that I have made:
– Matcha: Add 2 grams matcha powder to the rice flour and mix well. Follow the rest of the recipe. The amount of matcha powder may vary depending on the types you are using (I always use the best quality matcha powder which has a strong distinctive flavour).
– Pandan: Substitute the water with pandan juice (by blending pandan leaves with water and running it through a strainer to remove the pulp). Bring the juice to a boil and dissolve the sugar into the juice. You can also use pandan paste.
– Passion fruit: I take the juice from 5 passion fruits, then add in more water to get the same amount of liquid the recipe calls for. Add sugar to taste (the juice should taste sweet rather than sour). Bring the juice to a boil and let it cool down completely before using.
– Coffee: Add 2 grams instant coffee (Nestle’s Espresso) and sugar to boiling water and stir well to dissolve. You may add a little more sugar to balance out the bitter taste of the coffee.
– Strawberry: I used strawberry syrup and a little bit of Wilton’s red food colouring to intensify the pink colour.
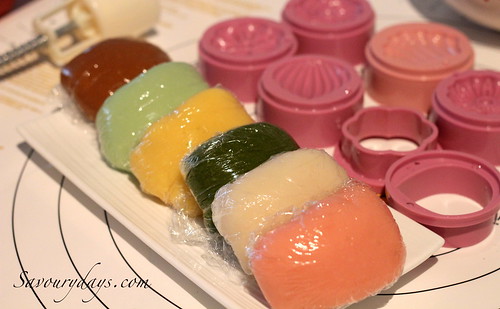
[Snow-skin dough ready for moulding]
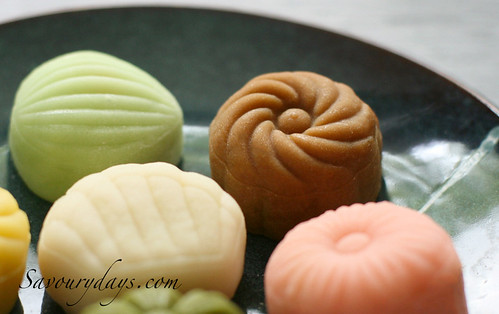
[My favourite is definitely coffee-flavoured snow-skin mooncakes – a perfect balance of bitterness and sweetness]
——————————–——————————–
- Recipe & Photos: Linh Trang
- Written by: Xuân Trần
- Edited by: Thảo Đan


JOIN US