I still remember back when I was still a young kid, I would wake up every day and breakfast would already be at the table, prepared by mom. We (my brother and I) would have different breakfast items every day, but my favorite was always these little sweet soft buns that my mom would buy from the bakery store close to our house. I would always take a good long sniff at the delightful buttery aroma while throwing it from one hand to another as it was still steaming hot. Then I would eagerly take a bite to find out what the filling would be inside that soft pillow-y bread. Mom would be smiling and telling me to hurry and finish off my breakfast before I’m late for school.
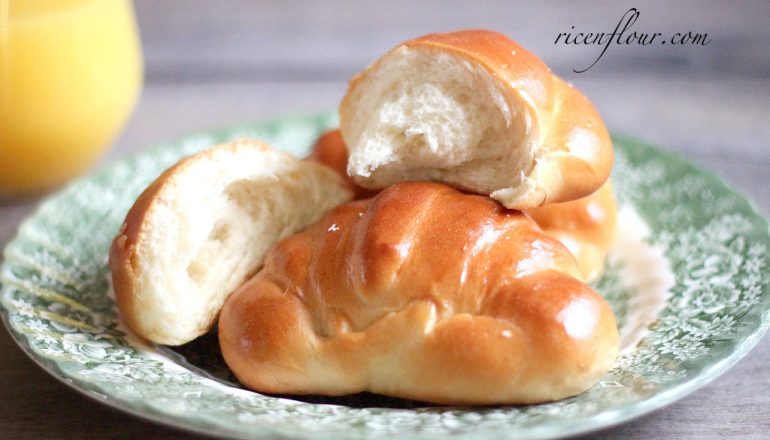
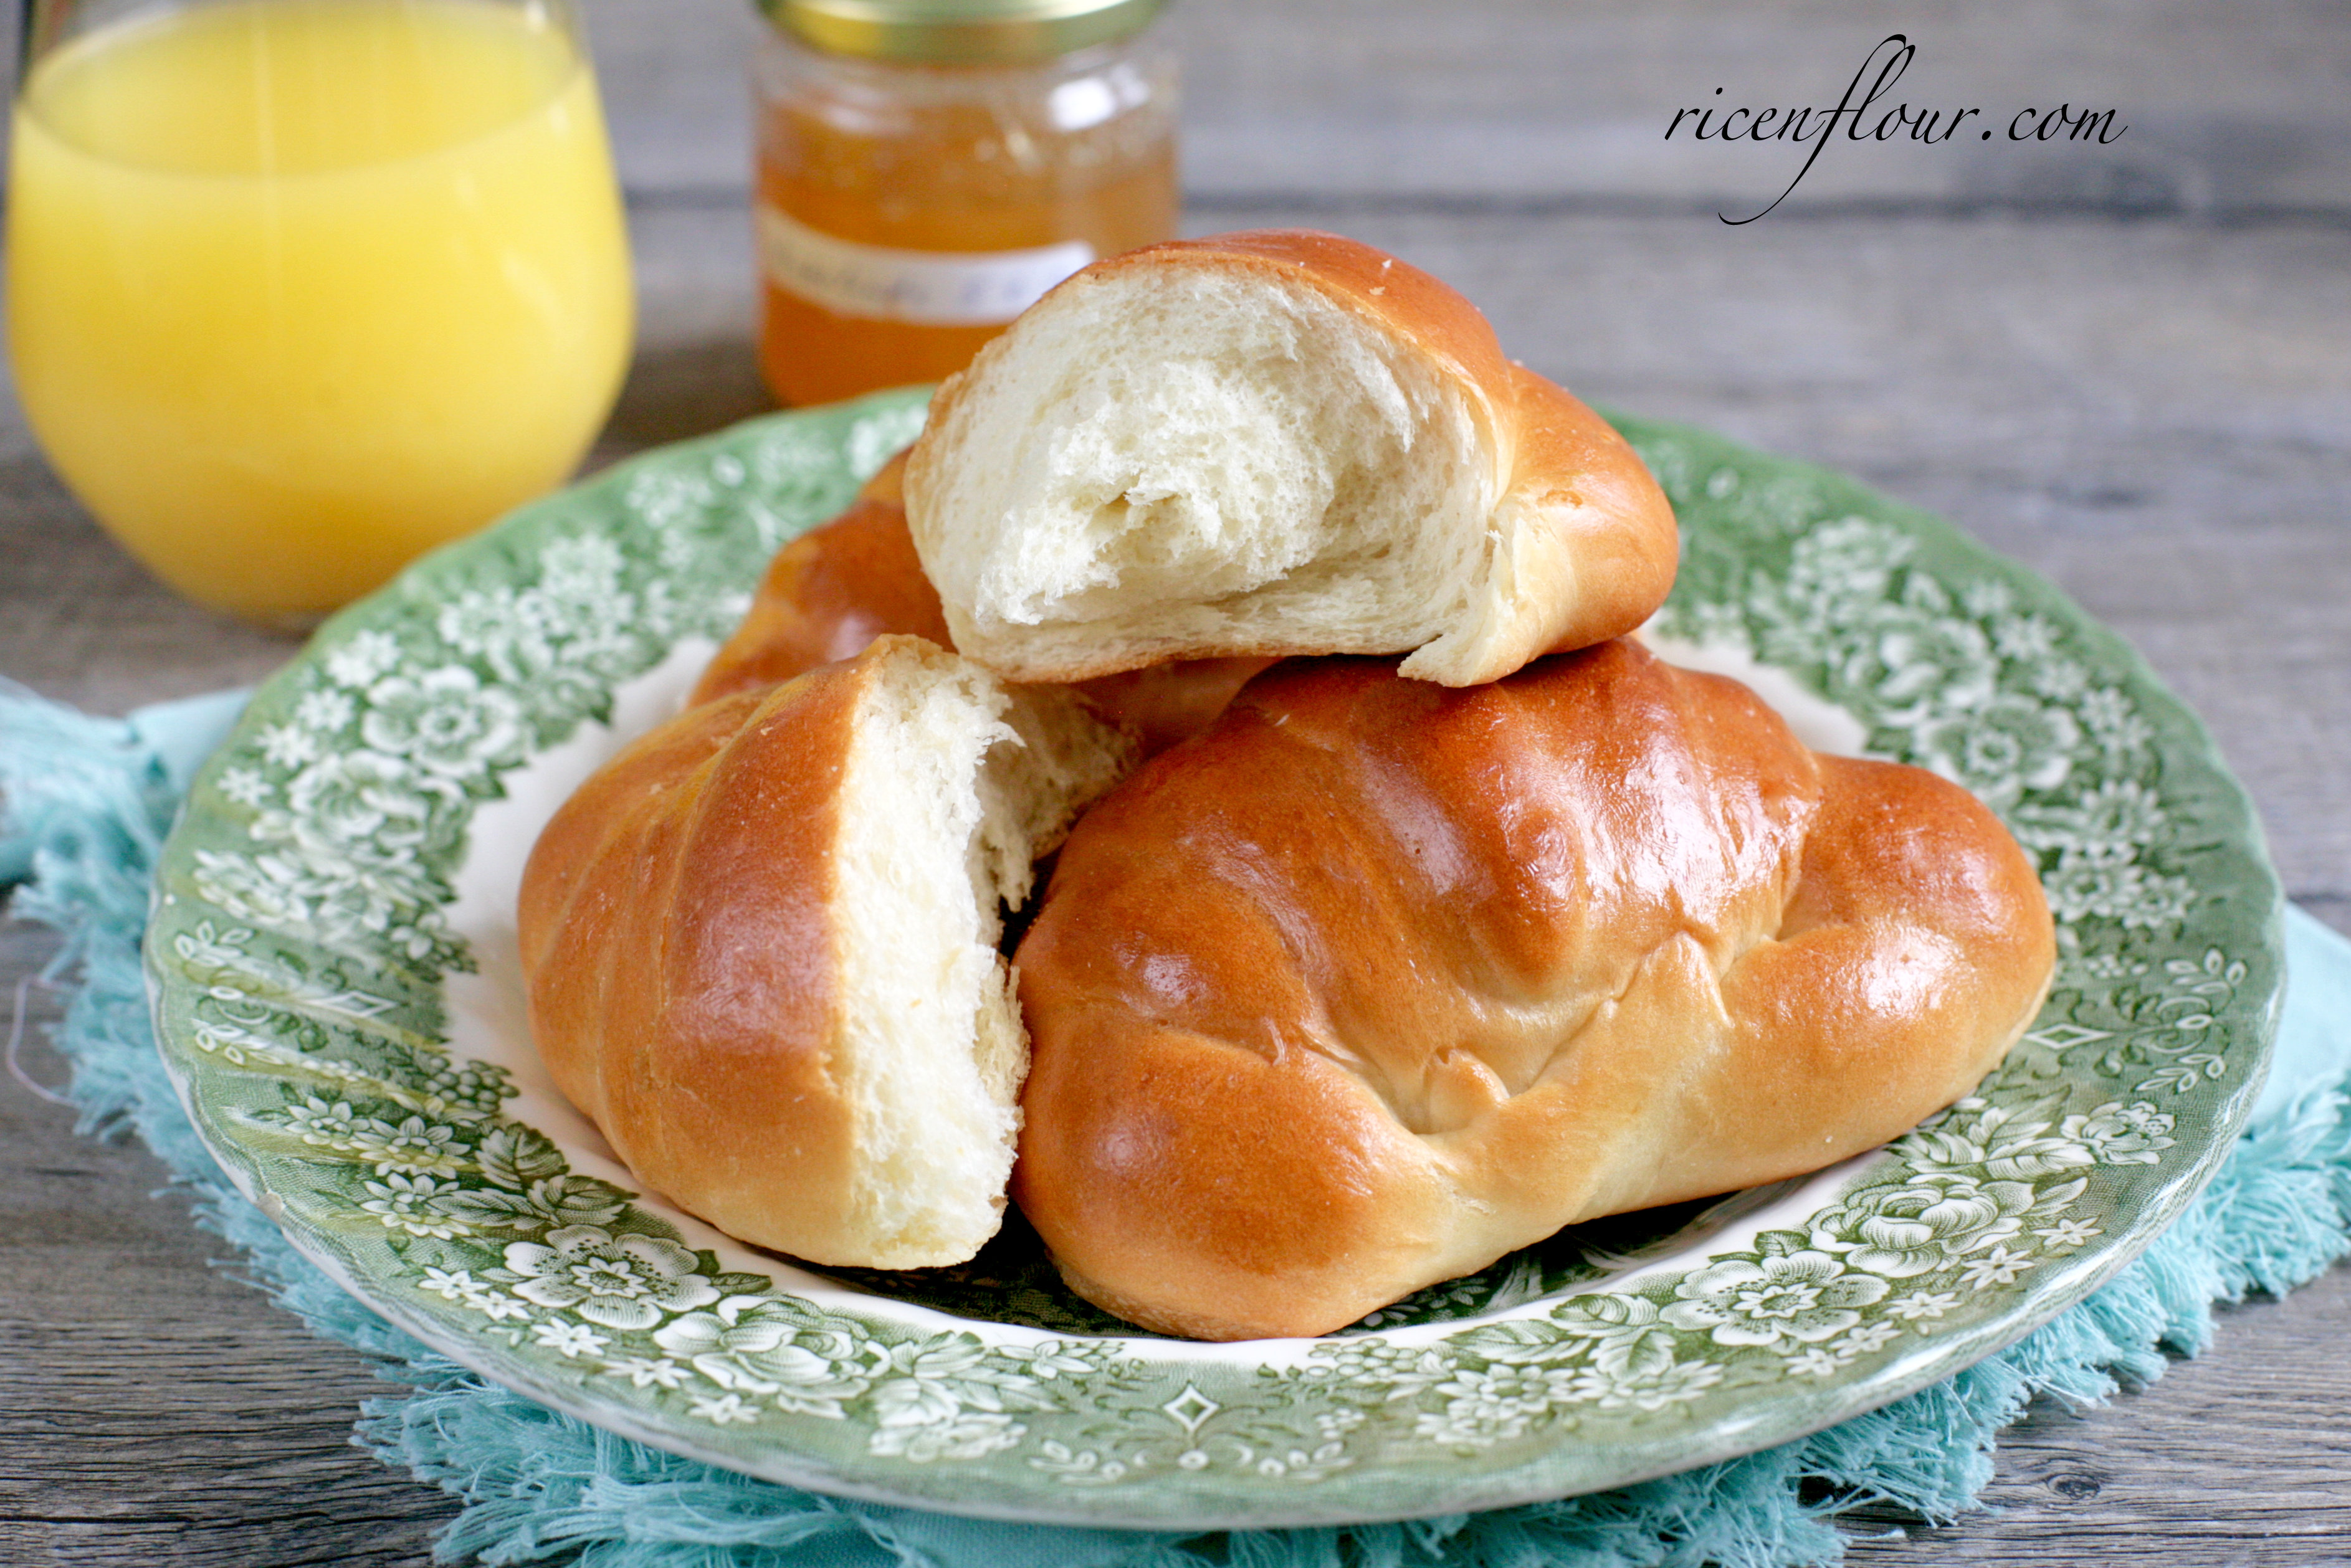
Food has always been a big part of my life, not only because baking/cooking is my passion, but also because it is tight with so many treasure memories. The instant when you see something and it reminds you of a sweet precious memory and you are like, oh yeah I remember that… ! I love having little flashbacks like this. Anyhow, today I will be introducing to you a recipe to my childhood soft buns. They are basic sweet buns that are quite easy to make and can be done with whatever kinds of filling of your choice (jam, custard, butter, sausage, etc…). I will also demonstrate 3 different shaping techniques for you to “play” with, the basic rolled shape, crescent/crab shape, and braided shape.
If you are a beginner in bread-making, I also leave you some tips as I go along the steps, as well as some hands-on “problems and solutions” at the end of the post.
SWEET SOFT BUNS (BASIC, CRAB/CRESCENT, & BRAIDED SHAPE)
Make: 6 crescent buns or 2 small loaves of 20 cm long, 10 cm wide.
INGREDIENTS:
- 250 gram (2 cup +/- 1 tbsp) bread flour
- 35 gram (2.5 tbsp) sugar
- 2 gram (1/2 tsp) salt
- 5 gram (1.5 tsp) instant yeast (that requires no activation before use, more information here)
- 130 ml (1/2 cup + 2 tsp) milk
- 25 gram (2 tbsp) egg (lightly beat one egg, take out 25 gram for recipe, the remaining to be used as egg wash)
- 42 gram (3 tbsp) unsalted butter – melted
*Notes:
– Use the correct yeast. If using dry yeast (but not instant), the yeast needs to be activated before use (refer to this post here for more information). Note: yeast is different from baking soda and baking powder, if using these 2 ingredients instead of yeast, bread won’t rise.
– Butter is an important contributor to the flavour of the bread. Choosing butter over margarine will give the bread much better aroma and flavour. If using salted butter, omit the salt in the recipe.
INSTRUCTIONS
A detailed recipe with all the specific notes is available on Savoury Days’ YouTube Channel (subscribe to get all the newly uploaded recipes) in both English and Vietnamese (select your preferred language by clicking CC > Setting > Language). You guys can check it out at this link or the video right below.
PRINTABLE RECIPE
1. In a bowl, put in flour, sugar and salt, mix well. Then, add in the yeast. It is important to follow the correct order of adding ingredients here as yeast should not be in direct contact with sugar and salt (which can weaken or kill it).
2. Make a hole in the middle of the flour mixture. Add in milk, egg, and butter. Using a wooden spoon, mix until everything is incorporated into a dough-like mixture.
3. Dust the working surface with a thin layer of flour. Knead until the dough becomes smooth, soft and elastic. The dough should have no indentation when pressing your finger against it. If gently stretching it out, it should resemble a thin membrane that won’t tear apart.
 Notes:
- For hand-kneading method, please refer to the video. The purpose of kneading is to form the gluten strands or gluten matrix, which create the texture as we see in bread. It is important to not press too hard or tear the dough during kneading.
- Different brands and types of flour have different water absorption capacity. Thus, the amount of liquid needed for your flour may be different than what it is called for in the recipe. If so, adjust the amount of liquid accordingly.
- In the first 3 – 5 minutes, the dough will be quite sticky; however it will get better as you go on. The total kneading time should be around 12 – 15 minutes or a little longer than that.
- Do not use too much flour for dusting as this may dry the dough. The resulting bread will be crumbly and not as soft.
- Another option is to use the mixer. For a 500-Watt mixer, I would recommend to knead the dough at the lowest speed setting for about 8 – 10 minutes. If going longer or faster than that, the gluten strands may break, dough will again become wet and sticky.
4. Prepare another bowl for proofing, brush a thin layer of oil around the sides and at the bottom of the bowl. Place the dough inside the bowl, give it a few turns so that it is covered with a layer of oil. This will help preventing the dough from drying out. Cover the bowl with a damp towel or cling wrap, proof at room temperature until the dough has doubled in size. Proofing time is around 45 – 70 minutes depending on where you live (warmer temperature speeds up proofing process).
5. Remove dough from bowl. Give another light knead for 2 – 3 minutes to “relax and rejuvenate” the gluten strands. Divide the dough into 6 parts, each weighs about 80 – 85 gram.
6. Shape the dough into balls (refer to video for instructions on how to best do this). Now you should have 6 dough balls.
7. Shape the balls to your preference. Refer to video for visual instructions on how to create crescent/crab shape and technique for braided bread.
* For crescent buns, I would recommend not to roll the dough too thinly as it may lose its shape during baking.
8. Tightly cover the shaped dough and let them proof for the second time at room temperature until they have doubled in size. Note that if you are to use a damp towel or cling wrap, it is important not to let it touch the dough. The dough may stick onto the towel/cling wrap and deflate when trying to tear it away from the towel/cling wrap after proofing.
* I would recommend to let the dough proof until they rise to 75%. It will rise more during baking, the resulting volume will be about 2.5 times more than the original dough. If proofing time is too short, the bread will be less soft and gives off a slight yeasty flavour. If proofing time is too long, the bread may give off an alcohol smell, sour smell and may become wrinkly at top after cooled.
9. Preheat the oven at 175˚C (347˚F), top and bottom heat. Use the remaining egg to mix with 1 tsp of water, then strain it through a sieve. Brush a thin layer of egg wash onto the surface of the dough. Do this very gently as the dough may deflate from strong force.
10. Bake at 175 – 180˚C (347 – 356˚F) for 17 – 20 minutes. If the top is browning too fast, cover it with aluminum foil. If the oven temperature is uneven, after 13 – 14 minutes, rotate the tray to make sure the bread is baked evenly.
* It is best to adjust the baking time well so that the bread will be just done. After removing from the oven, the crust should be fairly thin and soft. If baked for too long, the crust will be thicker, tightly stretched and hard. Bread that had been baked for too long will dry out faster and thus can’t be stored for long.
11. Remove the loaves/buns from the oven. When they are still hot, brush butter onto the surface to create a shinier look. They are best to be served warm. After the loaves/buns have cooled down to room temperature, store them in an airtight container for 1 – 2 days. Do not leave the loaves / buns out at room temperature for too long; otherwise they will dry out.
COMMON PROBLEMS AND SOLUTIONS
- Dough is too runny and unable to knead ⇐ Flour used has low water absorption capacity. Solution is to either increase the amount of flour or decrease the amount of milk.
- Dough is quite hard and difficult to knead, knead for long but still not smooth ⇐ dough is too dry, add more liquid.
- Dough does not rise during proofing ⇐ problems with yeast (expired yeast, yeast is no longer working from contact with high temperature), or using the wrong type of leavening agent (baking soda / powder instead of yeast).
- Bread appears wrinkly ⇐ Proofing time is too long
- Bread has an alcohol or sour smell ⇐ Proofing time is too long
- Bread has a yeasty smell ⇐ Next time, decrease yeast used to ¾ of original amount; activate yeast before use (even for instant yeast).
- Bread is dense and “wet” inside ⇐ Baking temperature is loo low or baking time is too short
- Bread is not soft, a little dry ⇐ Dough needs more liquid
- Bread is dense and dry inside ⇐ Either under-knead (not enough time for gluten to form and strengthen) or over-knead (gluten matrix is too tight)
- Recipe by: Linh Trang
- Written by: San Luong


what is soft flour used in your No Oven Cream Buns recipe. is it cake flour or what type is it. I live in South Africa & have not heard of soft flour. Do you have a detailed recipe for your No Oven Cream Buns in English
I got married to an Italian Australian husband about 10 years now. My mother in law was Italian cooking teacher but I failed making bread until I watched this video. Just can’t express how happy I am. Thank you so so much. Keep doing good works. Yen – from Australia.
Hi, thanks for your deliciously recipe, but I wonder if I didn’t use egg how could I do?! Because I’m a vegetarian so I don’t eat egg, pls help me!
They very beautiful rolls and bread. Love all the shaping. I can tell it will be very soft by just looking at the dough.