If you have not seen the recipe on How to Make Traditional Baked Mooncakes, check it out here.
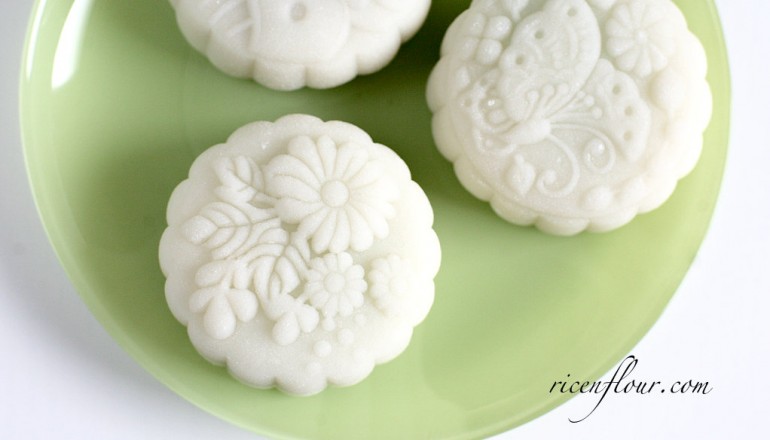
Making traditional Vietnamese snow-skin mooncakes is a lot simpler than baked mooncakes: the skin of the snow-skin mooncakes is made from cooked sticky rice dough, which is edible on its own already and does not require any cooking. Thus, there is a lot more room for creativity while making snow-skin mooncakes. The sticky rice dough is very elastic and therefore can be shaped into many shapes and sizes: there are some Vietnamese snow-skin mooncakes that are as large as a tea tray, or shaped into white piglets and rabbits. Legend has it that the ivory white colour of the round snow-skin mooncakes represents the wholeness and the purity of the full autumn moon.
Traditionally, the skin of the snow-skin mooncakes is flavoured by pomelo essence. A quick background review on pomelos for those of you who are unfamiliar: Pomelo originates from South ad South East Asia, and it is like the mother of grapefruit. Although the flesh and the flavour can be a bit similar, the main difference between pomelos and grapefruits is that the peel of the pomelo is much thicker, and the flesh of pomelo is more tart and tangy. Pomelo is the fruit of autumn in Hanoi. Essence is extracted from the flowers of the fruit, and because Hanoians have a great pride on the finesse of flavours in our regional cuisine, we love adding a tiny drop of this elegant essence into our sweets and desserts.
Today, I will be introducing to you how to make traditional Vietnamese snow-skin mooncakes with matcha mung bean fillings. Although there are savoury as well as sweet snow-skin mooncakes, I find that sweet and soft fillings such as mung bean or lotus seed paste work best with the soft exterior of the snow-skin mooncakes. Please note that this type of mooncakes is different from the snow-skin mooncakes that use shortenings and need to be kept cold until serve. For “the other” snow-skin mooncake, please check this Singapore cold snow-skin mooncake recipe.
How to Make Traditional Vietnamese Snow-skin Mooncakes
INGREDIENTS
A. Simple syrup
- 250 grams sugar
- 250 grams hot water
- 1/8 tsp cream of tartar (or 1/8 tsp lemon juice
B. Matcha (green tea) mung bean filling
- 100 grams yellow bean/ mung bean
- (at least) 300 ml hot water
- 45 grams sugar
- 40 – 45 grams coconut oil (peanut or other cooking oil can be a substitute)
- 5 grams all-purpose flour
- 2 grams matcha powder (or more, depending on the quality of your matcha powder and your taste preference)
- 40 ml water (to make matcha paste)
C. Mooncake skin dough
- 400 grams simple syrup (from part A)
- Approx. 200 grams cooked glutinous rice flour
- 1/2 tsp pomelo essence (or jasmine/ rose essence)
* Ingredients and Tool Explained:
– The high sugar content in both the skin and the filling of snow-skin mooncakes gives them a longer shelf life. The simple syrup for traditional snow-skin mooncakes may normally call for a ratio of 0.5 – 0.6 kg water to 1 kg sugar. However, if I have to choose between a delicious, just enough sweet mooncake but needs to be served asap and a terribly sweet mooncake that can stay for weeks, I’d rather go for the first one. Hence, in this recipe I apply the ratio of water to sugar as 1:1 so that the mooncakes have a mild and not too overwhelming sweetness. Despite having a “shorter life” than the traditional sweet version, my mooncakes can still last for 5 -7 days at room temperature (20 – 23°C).
If you prefer the cakes to be even less sweet, you may cut down some more the sugar in part A but do keep in mind though that the ’less added sugar’ version has a pretty short shelf life, about 2 – 3 days only.
– The filling:
- You can make any flavours of your preference. Key things to remember while making the fillings: they should have a high content of sugar and oil so that the fillings do not go off easily; and the filling should be cooked on low heat for a long time to let all the moisture content evaporate.
- The fillings in all of the recipes in this mooncakes series can be used for both baked mooncakes and snow-skin mooncakes.
– The skin:
- Perhaps the most difficult part of this recipe is finding cooked glutinous rice flour, which is only available in Asian supermarkets. This specific type of flour is made by grinding roasted glutinous rice grains and cannot be satisfactorily replaced by any other types of flour. Cooking or roasting glutinous rice flour at home does not create the similar type of flour. Also, steaming glutinous rice flour results in a different flavour in the final product: the skin will taste more similar to that of Japanese mochi than Vietnamese snow-skin mooncakes. A tip for those living in Berlin: I bought the cooked glutinous rice flour in a supermarket at Halle 3, Dong Xuan market.
– The moulds I used in the video is from Singapore. I don’t know if there are any online baking suppliers that offer these kinds of moulds. However, this recipe works well with any other kinds of mooncake moulds, so don’t worry if you can’t find a similar mould as mine. (also, many mooncake moulds are available on Ebay or Amazon, to search, use the keyword: “mooncake moulds”).
INSTRUCTIONS
Detailed video instruction has been posted on the Youtube channel of Savoury Days. You can watch it below or through this link. Remember to switch the video to HD for the best visual experiences 
PRINTABLE RECIPE
A. Simple syrup
1. Add sugar and hot water to a pan. Stir well to dissolve the sugar. Bring the pan to a boil on high heat.
2. Add cream of tartar when small bubbles begin to appear. Continue boiling the syrup for 1 – 2 minutes until the syrup comes to a hard boil and looks clear.
3. Remove the pan from the heat and pour the syrup into a clean bowl. Set aside to cool down completely.
B. Matcha mung bean filling
1. Rinse the mung beans carefully under running water to remove the starch. Add them to a pan with 130 ml hot water. Let the beans soak in hot water for 1 – 1.5 hours.
2. Add 45 grams sugar and some more hot water to the beans. Bring the pan to a boil on high heat, then reduce the heat to medium low. Stir regularly and add more water if necessary. When the beans are very soft and tender, remove them from the heat and let them cool down.
3. Process the beans and the water into a fine and smooth puree. Run the puree through a sieve to remove any lumps.
4. Add the puree to a pan on medium heat. Add half the amount of oil and stir well until combined. Add the other half of oil and stir constantly to help the water evaporate. The filling will thicken in 10 – 15 minutes.
5. Add flour and matcha powder to a bowl. Add water and stir well until incorporated. Add the matcha mixture to the filling pan, little by little. Mix well to make sure everything is incorporated before adding more matcha mixture.
6. Reduce the heat to low and continue stirring and folding until the filling becomes very thick and can hold its shape. Remove the filling from the heat.
7. Shape the lukewarm fillings into small balls of 60 grams each. Wrap carefully to prevent them from drying.
C. Mooncake skin dough
1. Add 400 ml simple syrup and ½ tsp of pomelo essence to a bowl. Stir the syrup constantly with a whisk while adding cooked glutinous rice flour, a tablespoon at a time. Make sure everything is incorporated before adding the next spoon of rice flour. When the dough is quite thick, you can change to a spatula to mix more easily. Continue until about 2/3 (140 grams) of the flour has been added and the dough becomes quite thick but is still wet and sticky.
2. Sprinkle 30 grams flour onto the counter. Turn the dough onto the counter, and cover its surface with a tablespoon of flour. Let it sit for 15 minutes.
3. Knead the dough lightly and gently. The flour will be incorporated into the dough while kneading, and the dough will slowly turn firmer and firmer. When most of the flour has been incorporated, the dough becomes smooth and no longer sticks to your hands. Divide the dough into small portions of 110 grams each. Cover to prevent them from drying.
NOTES: To make good ‘snow-skin’ of the snow-skin mooncake, the most important technique is mixing the dough:
– Only mix the dough until it holds its shape while still remaining quite sticky and wet (when you have used up about 2/3 – 3/4 of the flour). Then let the dough rest before adding the rest of the flour and kneading.
– If too much flour is added right at the beginning and the dough stops sticking to your hands even before resting, it will get too firm and tough afterwards. Thus it will be difficult to mould the cakes, the patterns will not stay on the mooncakes after moulding and the cakes will quickly harden.
– The water absorption level may vary from flour to flour; hence, the amount of flour used may range from 180 – 220 grams. The prescribed amount in this recipe is for reference only and I would recommend being flexible in adjusting the amount of flour used by keeping an eye on the state of the dough.
– The normal ratio of dough to filling is 2 : 1 for snowskin mooncakes. It’s better if you make the cakes slightly bigger than the cavity of the mould, so that when you press the mooncakes into the mould, they will turn out more defined and more ‘plump’. For example, I use 110 grams rice flour dough and 60 grams filling for a 150-gram mould.
– For snow-skin mooncakes, large and deep patterns (like the one I am using in this recipe) will look better than small detailed patterns on the mooncakes (like those in the baked mooncakes recipe); also, spring form moulds will not work as well as regular moulds. I am using a 150-gram mould in the video.
4. Use the palm of your hand to flatten the piece of dough, make sure the edge is thinner than the centre. Put a ball of filling into the centre of the skin and wrap the skin tightly around the filling. Seal carefully.
5. Roll the cake ball on the counter dusted with a bit of flour to prevent them from sticking to the mould. Put the cake into the mould with seamed side up. Use the palm of the hand to press evenly on the centre and around the edge so that the cake fits well into all corners of the mould. Lightly knock the mould onto the counter to remove the cake.
6. Continue with other pieces of dough. Cover all the cakes with cling film and let them sit at room temperature. Like baked mooncakes, snow-skin mooncakes taste better after a day or two. If you try the snow-skin mooncakes immediately within the day, they will taste purely like a sugar cube, as the sugar in the dough has not yet ‘developed’ completely. However, the skin will get more translucent, firmer and chewier overnight, as all the ingredients start developing flavours. They can be stored in air-tight containers in a cool and dry place and served within 5 – 7 days.
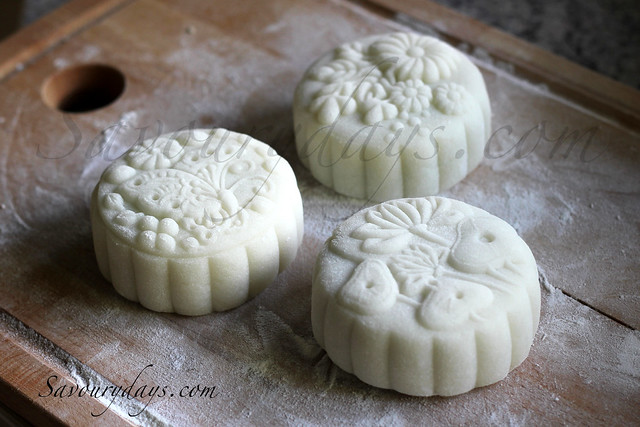
Freshly moulded snowskin mooncakes

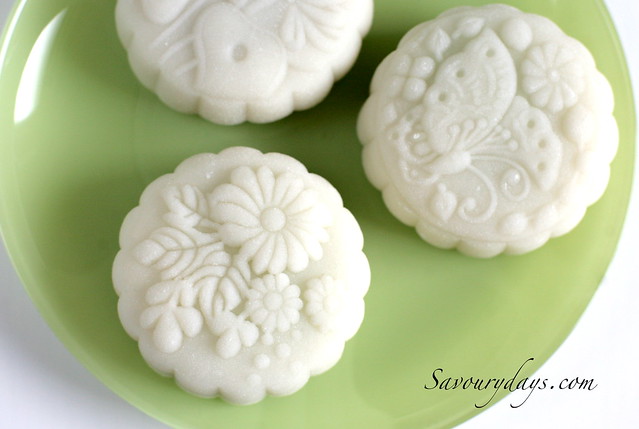
 after 1 day, the skin becomes more translucent and tastes much better
Common problems and solutions
– The skin is too wet or runny and can’t be moulded/ The patterns do not stay on the cake/ The dough is too sticky/ The cakes harden after a day: The proportion of flour and syrup is not accurate; the dough has not been left to rest.
– The filling is spoiled within a very short period of time (less than 5 days): The filling has not been cooked long enough and therefore still contains quite a lot of water; the filling does not have enough sugar and oil.
– The cakes are too sweet: You can balance the sweet taste of the filling by adding savoury, sour or bitter flavours into the filling or even the skin dough. For example, in this recipe, I mixed some matcha powder, which is bitter, into the mung bean filling to reduce the sweetness level. You can also try making mooncake skin doughs in matcha or chocolate flavours. To learn how to do this, check out my own snow-skin mooncakes recipe.
——————————–——————————–
- Recipe & Photos: Linh Trang
- Written by: Xuân Trần
- Edited by: Thảo Đan


Dear Sirs and Madam ,
Sorry to take your time.
We want to make snowy Moon cake.
Could you tell us what is the flour the dough is made snowy Moon cake? The exact name it is cooked glutinous rice flour ?
Where can this be bought? The dough, it is not necessary to bake in the oven? It was prepared originally? Did I understand correctly?
Thank in advance for your reply .
Have a nice day!
Best Regards,
Alexander Tigiev;
“Takhion” Ltd
tg21@inbox.lv
Yes, it’s called cooked glutinous rice flour. In Germany, I can find it in Asian supermarkets but this depends on the supermarket itself so I’m not sure that you can find this type flour in any Asian supermarket. Also, it’s hard to make it at home.
Since the flour is cooked, the dough and cake can be eaten right away without being baked or cooked.
hi, is there any ingredient that can replaced cooked glutinious flour?or we can cook the original glutinious flour by our self?thx
No, I’m afraid not, sorry…
These mooncakes look wonderful! Where do you get the pomelo essence? Everything else seems to be sold through Amazon, but I can’t find pomelo essence or flavoring anywhere with a google search.
Hi, I brought the pomelo essence with me from Vietnam. I know some Asian stores in Germany have it but not all of them… It’s great to have pomelo essence in snowskin mooncakes but if you can’t find it, you can use jasmine or pandan essence instead (jasmine essence is available on Amazon and pandan essence can be found in many Asian groceries).