Valentine’s Day is coming very close and for this day, I would like to arm you with a very special (and somehow magical) dessert, called molten lava cake.
You might have heard of this cake before, but if not, it’s a kind of chocolate cake with warm, oozy, chocolaty filling that can flow out like lava when you break the cake.
To get that runny filling, the very common method that most recipes (to my knowledge) apply is to bake the cakes on high heat in a short time so that the outside of the cake is baked but the center is still gooey. This method is simple and fast but quite risky, particularly for home-bakers who don’t have much baking experience. According to this method, we need to know exactly when to take the cake out of the oven. One minute overbake can make the cake center turn cakey. And if we intendedly bake the cake in a short time to assure the runny center, we may face the risk of consuming raw egg.
To fix this problem, I put real chocolate ganache fillings into my cakes. Thanks to these fillings, the chance that we can get the creamy, smooth and runny center is very high while the outside chocolate cake is always properly baked.

MOLTEN LAVA CAKE RECIPE
MAKE: 12 cakes
EQUIPMENT
- 1 silicon cake pop mould with 12 holes or an ice cube tray
- 12 cupcake/ muffin pans (mine are these Wilton heart silicon baking cups)
INGREDIENTS
A. Chocolate ganache fillings
- 45 gram (3 Tbsp) unsalted butter
- 60 gram (1/4 C) whipping cream (30 – 40% fat)
- 35 gram (2-1/2 Tbsp) caster sugar
- 25 gram (3-1/2 Tbsp) natural unsweetened cocoa powder
- ¼ tsp vanilla extract (optional)
- 1 – 2 tsp rum (optional)
B. Chocolate cake
- 160 gram (1-1/4 cup) all purpose flour
- 60 gram (1/2 C) natural unsweetened cocoa powder
- 160 gram (3/4 C) caster sugar
- 8 gram (2 tsp) baking powder
- 1 egg (medium size – 60 gram including shell) – at room temperature
- 150 ml (2/3 C minus 2 tsp) milk (unsweetened – at room temperature)
- 100 gram (1/2 cup minus 1 Tbsp) natural unsweetened yogurt
- 75 gram (5-1/2 Tbsp) unsalted butter – melted
- 1 tsp vanilla extract
METHOD
This recipe has a video tutorial and has been uploaded on my YouTube Channel (Savoury Days Kitchen). If you can’t play the video on this site, you can watch it directly on YouTube via this link.
Note: the video is in HD setting and has English subtitle, please press CC to activate it.
PRINTABLE RECIPE
A. Chocolate ganache fillings
- Add butter and cream into a bowl. Simmer some water on a saucepan. Put the bowl of butter and cream onto the pan (the bottom of the bowls shouldn’t touch water in the pan). Stir well to help butter melt and incorporate with cream.
- Take the bowl out of the saucepan. Sift into this bowl sugar and cocoa powder, mix very well until we have a smooth and nice mixture. Add vanilla and rum (optional).
- Divide this chocolate mixture into 12 portions, each portion is 13~14 gram. It’s easier to use molds like cake pop molds, ice-cube trays, mini cupcake molds. If you don’ have any, put this ganache into the fridge and wait until it solidifies and gets firmer, so that you can easily use a spoon to scoop it.
- Put these fillings into the freezer and freeze them for at least 12 hours so that they would become very very firm. Keep frozen until use.
B. Making the cake
Preheat oven at 190 C/ 375 F (top and bottom heat). Grease cake pans with cake spray. If you don’t have cake spray, grease the pans with softened butter, then dust some dry flour over this butter, invert the pans and shake to discard excessive flour.
- Dry ingredients: sift into a bowl the flour, cocoa powder, sugar, baking powder and baking soda. Whisk well and set a side.
- Wet ingredients: add into another bowl the egg, milk, yogurt, melted butter, vanilla and blend very well until smooth.
- Make a well in the center of the bowl of dry ingredient, pour the wet ingredients in. Mix quickly to incorporate ingredients. Stop when we see no dry flour anymore. The batter is perfectly fine to be lumpy. Don’t try to make it smooth because there more we mix the ingredients, the drier, more rubbery, denser and harder the cake will be.
- Fill about 1/3 of the cake pans with the chocolate cake batter. Remove ganache fillings out of their molds and put them into the cake pans. Fill all the pans with remaining cake batter (fill up to 4/5 of the cake pans so that the cakes have space to rise).
- Bake these cakes at 190 C/ 375 F for about 10 minutes at the middle rack of the oven. These baking time and temperature may vary among different ovens. In some ovens, the heat might be hotter than the actual temperature that we set. In some other ovens, top heat is hotter than bottom heat. So make sure to “understand” your oven so that you can set proper baking time and baking temperature.
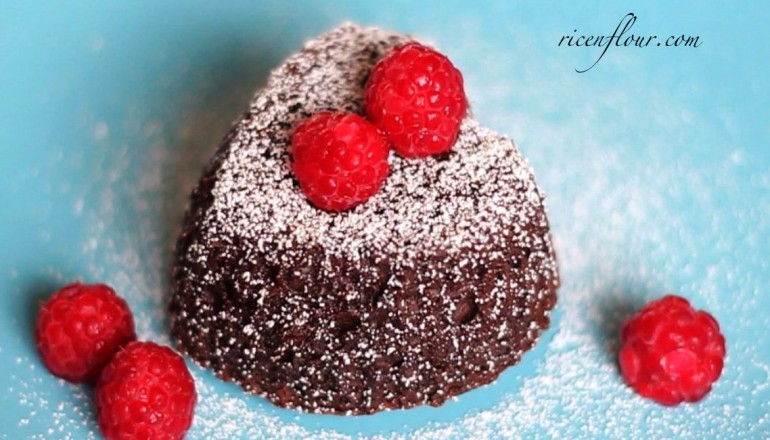
- After taking the cake out from the oven, let them cool in the pans for 3 – 4 minutes. Then invert the pans and put the cake onto a dish. Dust some powdered sugar and garnish with fresh raspberries up to your preference.
- These cakes taste best when they are still warm. So if they have cooled down, you’d better warm them up in the microwave for 20 – 25 secs.
- This recipe makes 12 cupcakes – medium size. If you don’t need that many cakes, you can simply scale down the recipe (my egg is 50 gram, so if you only bake half of the recipe and need just half a egg, lightly beat 1 egg and get 25 gram).
These cakes can be stored in air-tight boxes in a cool and dry place in 1 day. Microwave the cake for 20 – 25 secs to warm it up before serving.


JOIN US