Matcha (green tea) is probably one of the most popular health food at the moment. The full-of-life green colour of matcha powder, which is essentially the ground leaves of a special type of green tea, is a tell-tale sign of its many great health benefits. Certainly in Vietnam and many other Asian countries, matcha-flavoured desserts have been and are still all the rage; and in Japan where matcha originates, the most popular flavour combination would be matcha and azuki (red beans).
When I first posted photos of this matcha baked mooncakes on Facebook, I was so surprised at the surge in responses I got: many people asked me about the recipe, the type of mould I used, and especially about how I managed to make and preserve the vibrant green colour of the skin of the mooncakes. Therefore, I decided that this mooncake recipe would be the next one in RnF’s Mid-Autumn Festival series.
A. Mould
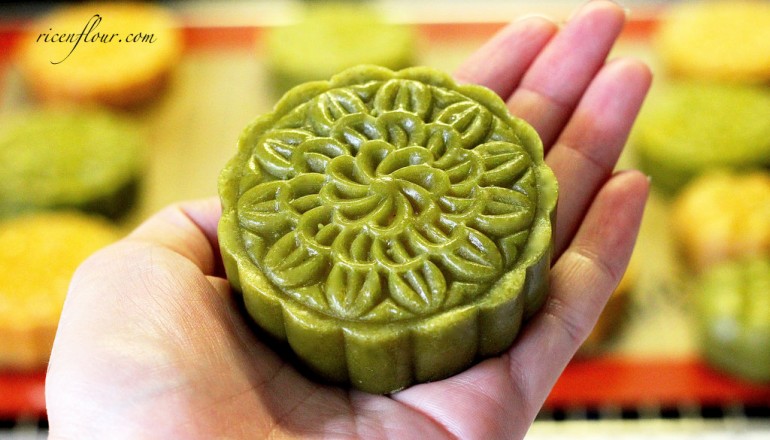
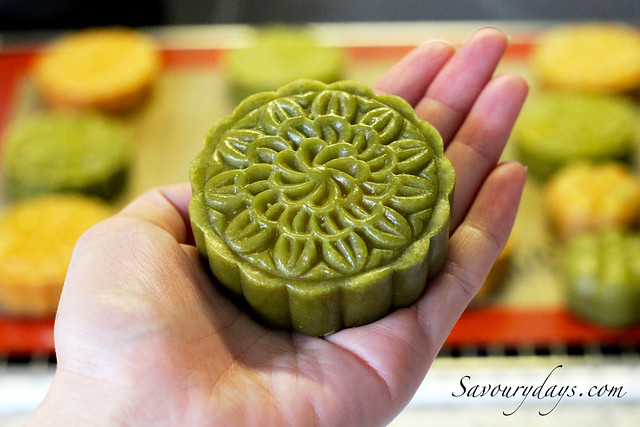
I used 100 gram mooncake spring moulds, you can find this anywhere online or in Asian stores and it usually comes with 4-6 different patterns for the top of your mooncakes. Petite mooncakes sure do look cuter and more appealing than overwhelmingly big mooncakes, therefore I decided to use a 100 gram mould to make a 90 gram mooncake in this recipe, making the mooncake a bit shorter than it should be. My 90 gram mooncake contains 60 gram red bean paste and salted yolk for filling and 30 gram dough for the skin.
B. Matcha-flavoured Mooncake Skin
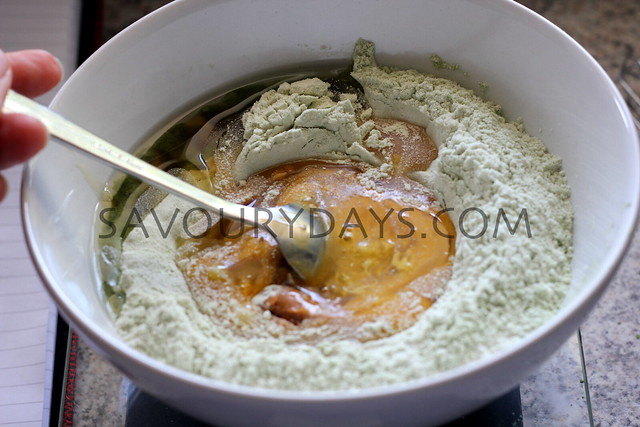
For the skin of the mooncake, I used the recipe for traditional baked mooncake skin previously introduced in this series. The golden syrup was made from white sugar and has been stored for 2 weeks. The only difference in this recipe is that I substituted 4 gram flour with 4 gram (2 tsp) matcha powder. Remember to sift the flour and matcha powder to remove all clumps.
Colour of the skin
The colour of the skin depends a lot on quantity and quality of the matcha powder. From the many batches I have made, I realized that a minor change in the amount of matcha can result in a huge change in the colour of the dough. The less matcha powder you use, the yellower and less green the mooncake skin will turn out, and vice versa. I usually use 4 – 4.5 gram for a recipe.
The quality and colour of your matcha powder can also have a huge influence. The 2 types of matcha powder I used produced 2 different green tones, despite the fact that they are both Japanese brands. Make sure to always use high-quality Japanese matcha powder in your cooking. Also note that the colour of the mooncakes will darken after baking.
Making and Baking the Mooncakes
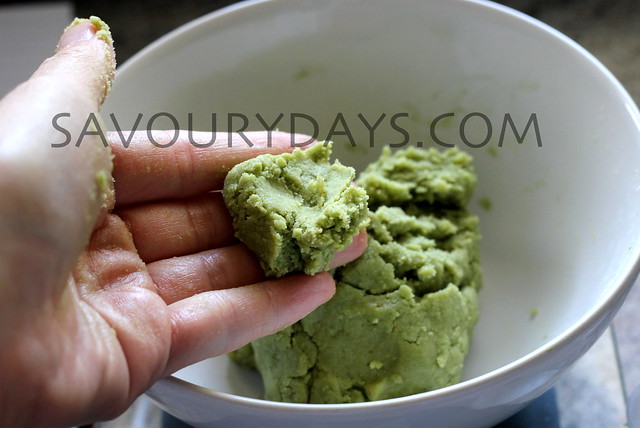
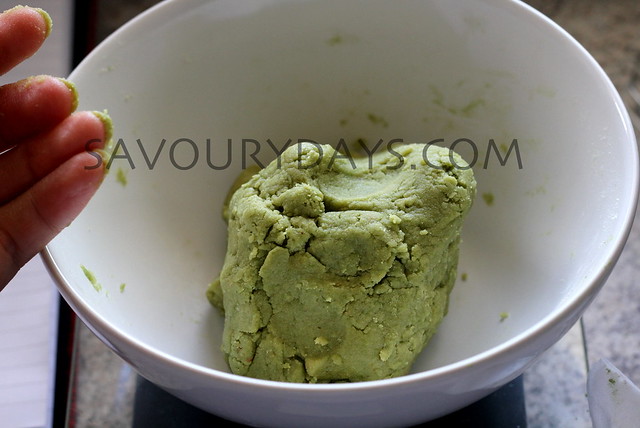
The procedure to make the dough for matcha mooncakes are similar to that of traditional mooncakes. The only difference is to sift in the matcha powder together with other flour, and mix it with other ingredients. Please read the detailed instruction in my recipe for traditional baked mooncake skin. Remember not to over-knead the dough – it should be a bit wet and moist right after kneading, and turn drier after 40 – 50 minutes of resting.
Mix all the ingredients together.
All ingredients are incorporated.
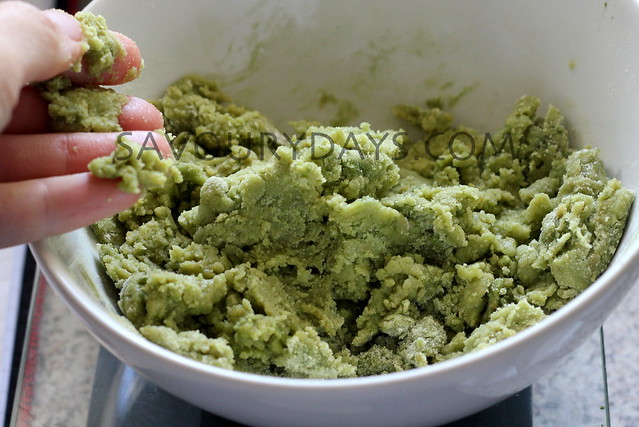
Mix for a bit longer until a dough is formed. Cover the dough and let it rest for 40 mins.
I bake the matcha mooncakes at 160 – 170 ºC at 1 rack below the middle rack (for a 5-rack oven).
Baking time will depend on the size of the cake. I baked my 90 gram mooncakes 3 times in total, with 2 egg wash in between and 8 – 9 mins for each bake. I used 1 beaten egg with 1/2 tsp water for the egg wash. The egg wash should be thin and should only be applied once the cake is completely dry to avoid crack on the surface of the mooncakes.
For matcha mooncakes, the temperature should be lower than usual (below 170ºC) since the higher the heat, the more yellow the colour of the mooncakes. Additionally, a small oven (like a table-top oven) will conduct heat quicker, therefore you should adjust the temperature accordingly.
C. Red Bean Paste Filling
For red bean paste filling, I used similar method as when making the mung bean paste
INGREDIENTS (to make 550 gr filling)
- 200 grams red bean
- 65 grams sugar
- 80 grams cooking oil (I used coconut oil)
- 10 grams corn starch or wheat flour
- 35 grams barley malt syrup
PRINTABLE RECIPE
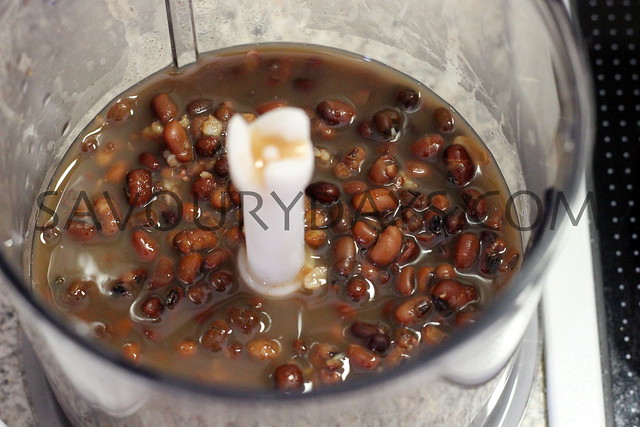
1. Remove any broken beans, stones and any beans that float on water. Wash and soak the beans in warm water overnight to soften them.
2. Drain the water. Place the bean in the saucepan with 3 – 4 cups water. Bring to a boil, lower the heat to medium low and cook until the beans are soft and tender. You can use a pressure cooker or add 1/4 tsp baking soda to the beans so that they cook faster.
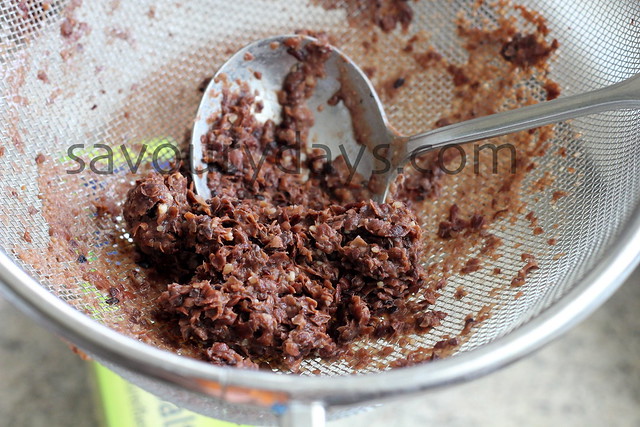
3. Blend the cooked beans with water to get a very smooth mixture. Don’t mind the amount of water too much as it will evaporate while cooking later. Strain through a sieve to get rid of any lumps and skins.
4. Add sugar and 1/3 of the oil to the mixture.
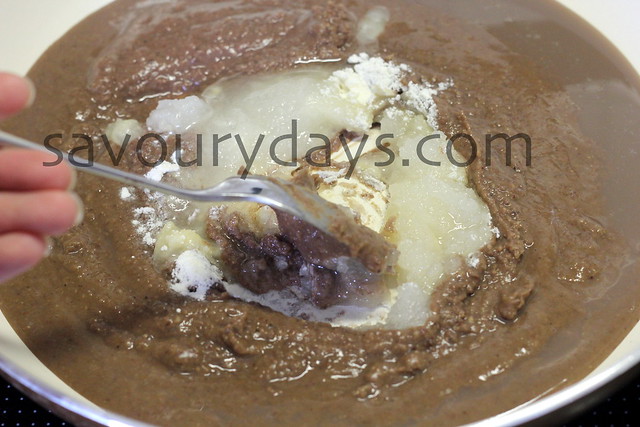
Pour the mixture into a pan on medium heat and start stirring. After 3 – 4 mins, add another third of the cooking oil and continue stirring. After 2 mins, add the rest of the cooking oil and stir well to mix. The mixture should still be liquidy.
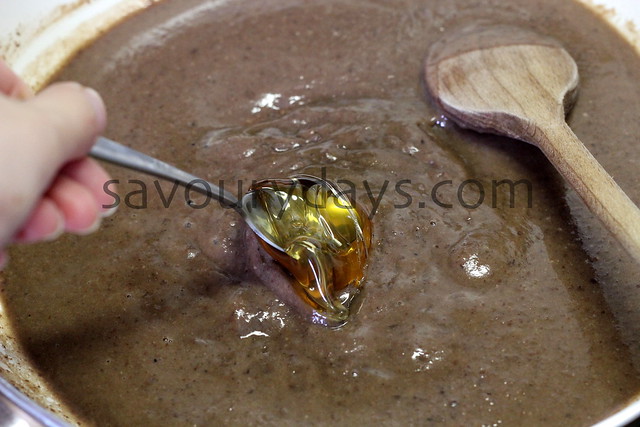
Keep stirring over medium heat for about 5 minutes. Mix the corn starch/wheat flour with 2-3 tbsp water and add it into the mixture. Add barley malt syrup and mix well. You can also substitute barley malt syrup with extra 80 gram regular sugar.

The barley malt syrup is extremely sticky but it will melt in the heat.
At this point, don’t add anything else into the mixture. Keep stirring over low heat until you get a smooth paste.
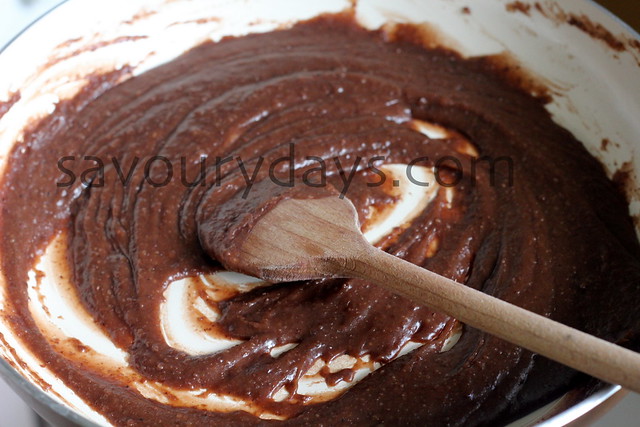

Test the filling by taking a small portion and shaping it into a ball. If the ball is firm enough to hold its shape, the paste is done. You can check out my previous recipe on mung bean paste to see the desired consistency of the filling.
A couple of key notes for perfectly smooth and moist red bean paste:
- Blend the bean with a lot of water so that the beans are properly processed.
- The oil will keep the paste smooth and moist, so make sure you add enough, however, you also want to make sure that the paste is not too oily which will later on soak through the skin and make it too soft. For 200 gram bean, you should use between 70 – 85 gram cooking oil.
- Add cooking oil, sugar and flour to the paste when the filling is still liquidy. Stir the paste over low heat so that the oil and sugar can be better incorporated. It will take a while but good things come to those who wait

——————————–——————————–
- Recipe & Photos: Linh Trang
- Written by: Phương Nguyễn
- Edited by: Thảo Đan


JOIN US