After a loooong wait, it’s finally strawberry season in Europe again. For a baker like me, going grocery shopping these days almost feels like a kid walking up to the Christmas tree the morning after Christmas Eve. All the colorful, fresh and juicy fruits – especially berries – would be waiting for me to transform them into amazing desserts of endless options.
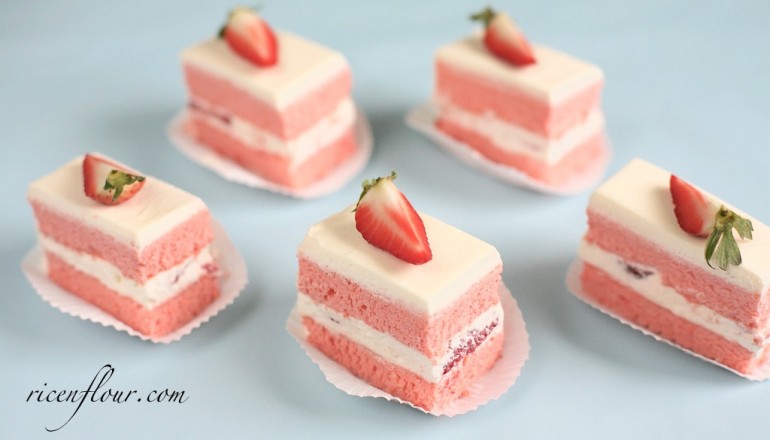
This cake that I’m introducing today was inspired by the Japanese Strawberry Shortcake, which can be found in all cake shops along the streets of Japan. It’s basically a foam cake or sponge cake, but the Japanese people call it shortcake for some unknown reason. Regardless of what it’s called, this cake is very well known for its extremely light, fluffy texture and the heavenly perfect combination of fresh strawberries and whipping cream. It’s so good that I can’t help recreating it at least several times every strawberry season. I also added a few drops of red food coloring to the batter; the final product is so damn cute that I just fell in love all over again. And I guarantee your guests will, too.

JAPANESE STRAWBERRY SHORTCAKE RECIPE
Tools: 9 x 13 inch (22 x 23 cm) rectangle pan. A slightly smaller (20 x 30cm, for example) or bigger pan is fine too.
Ingredients
A. Sponge cake
- 4 egg yolks (18 – 20 gr each) – at room temperature
- 20 gram (1.5 Tbsp) sugar
- 40 ml (2 – 2/3 Tbsp) milk
- 40 gram (3 Tbsp) oil
- ½ tsp vanilla extract – optional
- A few drops of strawberry essence – optional
- ¼ tsp red food coloring
- 30 gram (1/4 cup) all purpose flour
- 30 gram (3 Tbsp) corn starch
- 4 egg whites (30 – 35 gram each) – at room temperature
- Pinch of salt
- ¼ Tsp cream of tartar
- 60 gram (4.5 Tbsp) caster sugar – sifted
B. Topping and garnish
- 200 ml (3/4 cup + 1.5 Tbsp) whipping cream (35 – 40% fat) – chilled
- 23 gram (1.5 Tbsp) sugar
- 150 gram (~ 5 oz. sliced fresh strawberries)
- 100 gram berries to garnish
* Note:
- If you don’t have red food coloring or strawberry essence, you can substitute part of the milk with strawberry syrup. Natural food coloring, such as beetroot, gives a nice color, but if you use too much your cake might taste like beetroot.
- Topping cream can be substituted for whipping cream. Topping cream is an artificial cream, so it doesn’t have as much of the rich taste as whipping cream does, but if you prefer a “lighter” cream then you can use it.
- If you want to use cake flour, substitute all the 60 gram flour in the recipe with 45 gram cake flour + 15 gram corn starch.
Method
Detailed step-by-step instructions and notes can be found in the video on Savoury Days’ YouTube channel (don’t forget to sign up and subscribe to receive the latest notifications as soon as our videos come out). You can watch below or at this link.
Don’t forget to select HD to view the video with the best definition and quality 
Summary of main steps:
* Preheat the oven at 170°C/ 338°F, both top and bottom heat. Line the cake pan with parchment paper.
1. Add egg yolks and 20 gram sugar into the bowl, whisk briefly until the sugar dissolves. Add red food coloring and strawberry essence, mix well.
2. Add milk, oil and vanilla extract, mix well to combine.
3. Sift flour and corn starch into the bowl, whisk until everything is incorporated and smooth, with no visible lumps. If the color isn’t strong enough, add more food coloring. The egg yolk mixture should have a dark pink tone, which will become a nice light pink shade when we add in the egg whites.
4. Whip egg whites with salt, cream of tartar and the rest of the sugar until stiff peak: the egg white should be firm and glossy. When you lift the beaters, the peak should hold without drooping into a hook.
* Note: Egg whites, mixing bowl and beaters must be completely free from any egg yolks, oil, butter, grease, or fat of any kind. Even a tiny drop of fat mixed in with the egg whites will make them unable to whip.
5. Fold the egg whites into the egg yolk mixture. The final batter should be very smooth, foamy and free of large air bubbles. It shouldn’t be runny either.
* Note:
– Egg whites are usually mixed into the batter using a spatula. In this video, I demonstrated the folding technique using a wire whisk instead. This method is commonly used when egg whites have been slightly overbeaten (when you fold the whites in, they are lumpy and quite difficult to be mixed).
– After the mixing step, if the batter is too runny with a lot of large air bubbles, then you have either underbeaten your egg whites, or your folding technique isn’t on point, causing the air bubbles in the whites to be deflated. If you bake this batter, your cake won’t rise well, with a dense and chewy texture.
6. Bake the cake in the middle of the oven at 165 – 170°C (329 – 338°F) in 25 – 30 minutes until the top is golden brown and springs back when lightly pressed.
* The baking temperature varies depending on each oven. If your oven is small, or has unstable temperature, you might have to move your pan to a lower rack and bake at lower temperature (150 – 160°C/ 300 – 320°F).
7. Unmold the cake from pan, remove parchment paper. Let cool completely.
* It’s better to place the cake on a clean cloth and let both sit on the cooling rack. The cloth prevents the cake from sticking to the rack, and helps the steam escape faster.
8. While waiting for the cake to cool, whip cream with sugar until stiff peak. When the cream has become billowy, whip at lowest speed to avoid overbeating. More tips on how to make whipped cream and fixed over-whipped cream are available here.
Slice strawberries. Chill strawberries and whipped cream in the refrigerator for 30 minutes, the cream will be thicker and easier to frost.
9. Once the cake has completely cooled, trim the edges and cut the cake in half. We get two equal rectangle pieces.
10. Place first piece of cake on your cake stand, tuck overlapping pieces of parchment paper under the edge of the cake to keep your cake stand clear of any cream.
11. Frost the top of the cake with about ¼ of the whipped cream. Lay strawberry slices on top of the cream. Spread some more cream on top. Place the second cake piece on top. Frost the entire cake with just enough cream to cover. Then refrigerate the cake for about 30 minutes for the cream to set. This crumb-coating step will prevent cake crumbs from getting into the cake frosting, which will give you a nice, perfectly frosted cake.
12. Frost the cake with the rest of the cream. After this step, you have two options: (1) Garnish the cake with berries, which gives you a whole cake; or (2) cut the cake into small servings and garnish each small piece separately. Always cut the cake with a sharp knife. Wipe the knife clean after each cut.
Keep the cake refrigerated for about 2 days. It tastes a lot better after being chilled

——–
- Photos and recipe: Linh Trang
- Written and edited by: Holly Phuong Le


Can I use cake flour instead of all purpose flour? If yes, do I still need corn flour?
It’s best if you follow the recipe exactly and use both AP flour and corn starch. However, using only cake flour (60 gram) and no corn starch is also fine. The cake may be a bit less fluffy and soft but it still tastes good. G
Cake is nice the recipe very detail n easy. Good
thank you