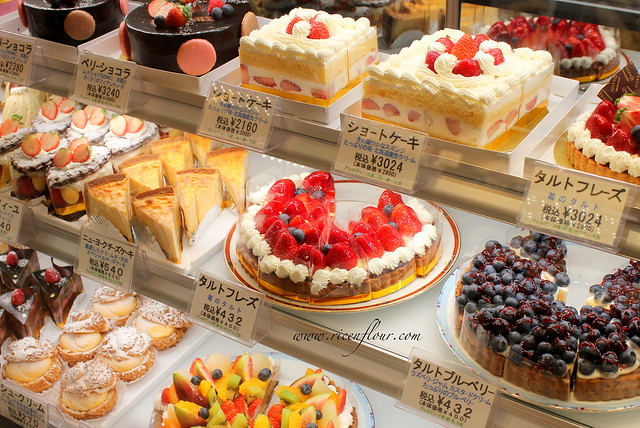
The first time when I visited Tokyo, I was really thrilled by the number of bakeries and patisseries here. All look so good, so professional and soooo tempting to a person who has such a huge sweet tooth like me. One of the things that attracted and impressed me most was the beautiful combination of Western style and Eastern taste that was applied in many types of breads, cakes, and desserts here. It seemed to me that the Japanese pastry chefs had already reached the (more than) advanced level in their professions. And as a result, they were able to deliver such delightful and soft breads with the flavour of green tea, or create the incredible matcha or honey baumkuchens.
Inside a patisserie in Tokyo
 Matcha Baumkuchen
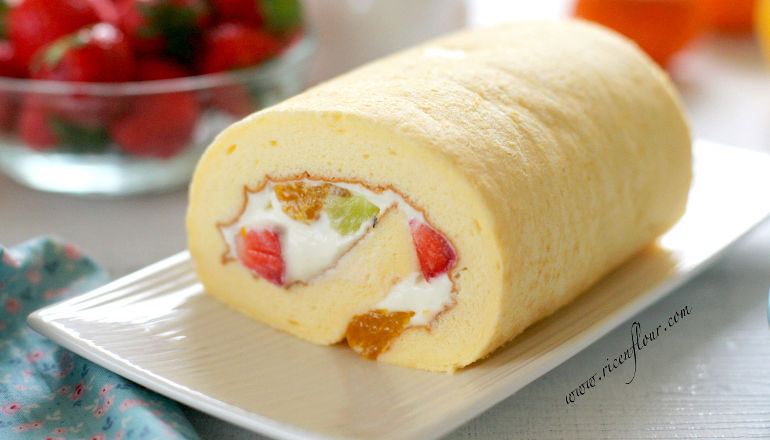
 This fruit roll cake is another example. I “met” this roll cake in almost every patisserie in Tokyo. It was amazing that all of them look very much alike: perfectly roll-shaped, bright golden cake with white cream and colorful fresh fruits inside – simple yet elegant, so attractive that passer-by just can’t resist the temptation to take a glance, and then… a slice (or a roll
  ). Although the three parts, i.e. the cake, the whipped cream and the fruits, contain nothing special inside, the combination of them creates such a beautiful taste of softness, tenderness, creaminess, sweetness and super-fresh tang and crunchiness (of the fruits). This cake batter is also my most favorite recipe for roll cakes. Compared to the Swiss sponge roll cake, this recipe provides a much softer and more tender cake, which is also very flexible that can be rolled even when it’s cool completely.

JAPANESE FRUIT ROLL CAKE RECIPE
EQUIPMENT: One Square pan of 9 x 13 inches (22 x 33 cm) – however, a bit smaller (for example: 8 x 12 inches/ 20 x 30 cm) or bigger pan can be used instead.
INGREDIENTS
A. For the Cake
- 4 egg yolks (18 – 20 gr/yolk) – room temperature
- 20 gram (1-1/2 tablespoons) caster/ ultrafine sugar
- 40 ml (2-2/3 tablespoons) milk – room temperature
- 40 gram (3 tablespoons) vegetable oil
- 3 ml (1/2 teaspoon) vanilla extract
- 30 gram (1/4 cup) all purpose flour
- 30 gram (3 tablespoons) corn starch
- 4 egg whites (30 – 35 gr/egg white) – at room temperature
- a pinch of salt
- 3/8 teaspoon cream of tartar – or substituted by lemon juice or white vinegar of equivalent amount
- 60 gram (4-1/2 tablespoons) caster/ ultrafined sugar – sifted
B. For the Filling
- 125 ml (1/2 cup) whipping cream (35 – 40% fat)
- 20 gram (1-1/2 tablespoons) caster/ ultrafined sugar – sifted
- Fruits of your choice (I used 1 kiwi, 70 gr canned clementine and 8 – 10 strawberries)
INSTRUCTIONS
This recipe has a video tutorial and has been uploaded on my YouTube Channel (Savoury Days Kitchen). If you can’t play the video on this site, you can watch it directly on YouTube via this link.
Note: the video is in HD setting and has English subtitle, please press CC to activate it.
* Printable recipe:
- Preheat the oven at 170 °C (340 °F) – Top and bottom heat.
- Put the yolks and 20 gram sugar (1-1/2 tablespoons) in a bowl, gently beat them until the sugar is totally dissolved and incorporated with the yolks.
- Add milk, oil, vanilla and mix them well with the yolk and sugar.
- Sift flour and corn starch into the mixture, mix them well until we have a smooth and fully incorporated mixture.
- Whip egg whites with salt, cream of tartar and sugar until they form stiff peak, i.e. whipped egg whites become smooth and glossy, if you lift the beater, they form a peak that holds and stands.
- Fold the whipped egg whites into the yolk mixture until we have a fluffy, foamy and smooth batter without big air bubbles. The batter shouldn’t be too thin or runny.
- Pour the batter into the pan (lined with parchment paper). Bake in the middle of the oven, at 170 °C (340 °F) in 25 – 30 minutes, until the cake turns dark golden. If you lightly press a finger on the cake, it should spring back in shape.
- Take the cake out of the pan and remove the parchment paper. Let it cool down on a rack.
- Whip whipping cream with sugar until it forms stiff peak. When the cream looks thicker and forms trails, it’s best to set the speed to low and continue whipping at this speed. This helps to avoid over-whipping the cream, which will make it curdled.
- Chop fruits into pieces. Put the whipped cream and fruits in refrigerator for 30 minutes. The cream will get thicker, thus easier to be spread on cake.
- When the cake is totally cool, cut off the edges, which are usually dry and easily crack when rolling. Put the cake on an aluminum foil (or parchment paper if you’d prefer) with the brown side turning up.
- Spread the whipped cream on the cake, leaving 0.5 cm (0.2 inch) on the two side edges and 2 cm (0.8 inch) on the bottom edge (as the cream will be pushed to the end when rolling). Lay fruits onto the cream.
- Gently but decisively roll the cake over. Aluminum foil may help if you’re not familiar with rolling cake. As aluminum foil is quite hard, it’s easier to hold the shape of the roll. Remember to roll the cake over in decisive motion. My experience shows that the more hesitant we are, the more easily we can break the cake.
- Wrap the roll with cling film. Chill it in the refrigerator for 3-4 hours. The cake is best to be served cool.


This is really an amazing recipe! So soft and tastefull… Thank you. I will definitely make more of your recipes.
Thank you very much for your feedback
I love this recipe! I want to use same recipe and add cocoa powder. How can I adjust it? I try same amounts for everything and add 2 Tbps cocoa powder. But the texture was less sponge. Any idea?
Wonderful recipe
Many thanks !
I was a little skeptical in the success of my sweet roll,I changed my mind and I try to do these days,thank you and good luck for everything <3
I made this cake yesterday and it was delicious! I replaced the cream filling with cream cheese icing because that is what I had on hand and it still tasted great!
To those who find that their cake breaks when rolling, I rolled my cake as soon as it came out of the oven. I laid the cake flat on a tea towel and with the help of the tea towel, I rolled the cake and allowed the cake to cool inside the towel. This kept the cake moist and also held its shape in to a perfect round roll. I will definitely try this recipe again and try it with different flavour combinations.
Hi, I have made some of your cake recipes and they all turned great and fluffy. Thank you for your awesome recipes . I have a question, if I want to make a chocolate roll cake, how many grams of chocolate powder should I put in the recipe? Thank you in advance. Have a good day
Great recipe and turns out really well at 1st attempt. Thanks for sharing the video. Helps noob like me!!
The video looks great. I tried this recipe. Though the cake turns out good, it breaks while rolling. I did not overbake it. I wonder what went wrong.
Is it bad that I put it in the freezer? Can I just defrost it?
No it should be ok after being defrosted.
So glad I followed this recipe, simple and great taste!!! Made my 2nd cake today, turned out perfect again! Thanks so much!
If I want to make chocolate and mocha flavors, wondering if you have attempted before, if so, would you mind sharing the recipes too?
Thanks heaps!
Hi Lin. I’m sorry for my late reply. For chocolate flavor, you can substitute 10 – 15 g cornstarch in the recipe with cocoa power, the rest of ingredients remain. For mocha flavor, you can mix some instant coffee powder with the flour, or replace some milk with coffee. Hope this helps
Thanks Linh😊 I will try the chocolate this weekend.
Wow, this is a great recipe! The cake turned out beautiful and tastes so authentic
Thanks a lot for your feedback, Tiffany
Thank you for such an amazing roll cake. It’s so soft, fragrant, creamy and fruity. Delicious combination. I follow the recipe exactly and it is a success!! Thank you again.
You’re welcome. Thank you very much for your feedback, too. I’m very glad that you liked the cake