If you are to visit a Vietnamese home during Tết (Lunar New Year holiday), there are certain things you will almost always see: a pot of cherry blossom (Northern Vietnam) or golden apricot flowers (Southern) or a kumquat tree, living room decoration in a red and gold theme, calligraphy hanging on the wall, and on the living room table – a tray of sweets and treats. The sweet tray is usually a set of smaller individual trays put together, and it is usually in a flower shape or a circular shape – a symbol of completeness – the state of family gathering during Tết. The tray also represents the hospitality of the Vietnamese – it is always full when the guests arrive, because we believe that good food is the start of every great conversation.
cherry blossoms – a very popular kind of Tet flowers in Northern Vietnam

Today, there are many types of delights that can be put in the tray: roasted pumpkin seeds, melon seeds, raisins, candies, etc. But most traditionally, the tray is to be filled with mứt Tết – candied fruits. ‘Mứt’ is literally translated as ‘jam’, but this Vietnamese ‘jam’ is more like a type of candies, usually served with a pot of tea, rather than the Western jelly jam served with bread. The choice of mứt is not necessarily restricted to fruits – candied carrots, sweet potato, ginger, and the most fancy of all – candied rose petals are also available. The tray itself is like a harmony – not only in terms of flavour but also colour. Candied fruits are all brightly luscious, and they are all sweet, but there are so many different levels of flavours that will make you want to try everything in the tray. The most common composition is white and green candied coconuts, red candied strawberries, orange candied carrots, yellow citrus candies, … Candied ginger is actually my favourite – the light sweetness and the tingle of spiciness and warmth of the ginger at your tongue goes perfectly with a nice cup of tea.
Nowadays, packaged sweets are slowly replacing the traditional mứt in modern homes. Admittedly, I am not a big fan of candied fruits, mostly because I don’t have a sweet tooth. Nevertheless, there is something about that delightfully eye-catching colourful box that will forever remain a fond memory of Tết for me and many adults alike, and also a great treat for the kids to look forward to when spring comes around every year.
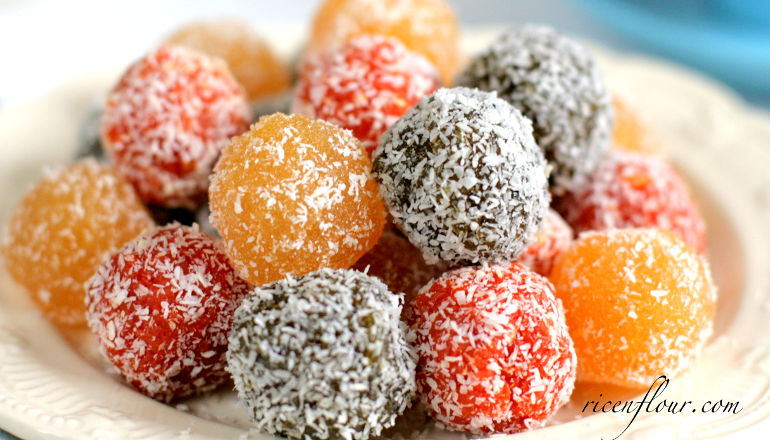
And there are some types of mứt that are popular all year round, not just during the Tết period, one example is these gummy fruit candies or candied fruits. Made from fresh fruits, these candies are a lot more healthy than the store-bought ones. Not only can we avoid the artificial sweeteners and preservatives, but we can also have a better control of the sweetness level as well. In addition, we can “play” with these candies by trying different fruits and combinations of flavours. In this recipe today, I would recommend you to try making candied kiwis. It is most definitely not traditional – kiwis hadn’t made an appearance in Vietnam until about a decade ago, but the perfect balance of sweetness and tartness and fruitiness of a kiwi candy is absolutely well worth a try.

GUMMY FRUIT CANDIES RECIPE
This recipe has a video tutorial and has been uploaded on my YouTube Channel (Savoury Days Kitchen). If you can’t play the video on this site, you can watch it directly on YouTube via this link.
Note: the video is in HD setting and has English subtitle, please press CC to activate it.
PRINTABLE RECIPE:
INGREDIENTS
- 500 gram (1 lb.) fruits of choice – preferably fruits with lots of pulps like pineapples, strawberries, carrots, durians, …
- 100 – 140 grams caster sugar (1/2 – 2/3 cup) – varies depending on the sweetness/tartness of your fruits
- Vanilla extract (optional)
- 30 – 45 ml (2 – 3 tablespoons) sugar syrup (instruction below). You can substitute with honey, corn syrup or golden syrup.
- 15 ml (1 tablespoon) lemon juice (optional)
- Desiccated coconut, toasted sesame seeds, granulated sugar, … – for candy coating.
INSTRUCTION
With the amount of listed above ingredients, and also depending on your fruits, you will yield about 250 – 300 gram candied fruits (approx. 1/2 lb). Each candy weighs about 10 – 15 grams (1/2 oz.).
This is a very flexible recipe. The method is the same, but you can totally change and have fun with the ingredients to make different types of candies.
A few rules of thumb
- Sweetener: vary according to your own preference. If you’re not too sure when you’re making candies for the first time, remember – less is more. It’s easier to add more sugar later rather than fixing overly sugary candies.
- For pineapples, I use 500 g (1 lb.) pineapples : 100 g (1/2 C) sugar : 2 tablespoons sugar syrup
- For carrots, 500 g (1 lb) carrots : 100 g (1/2C) sugar : 4 tablespoons sugar syrup
- For kiwis, 500 g (1 lb) kiwis : 130 g (1/2 C plus 2.5 Tbsp) sugar : 2 tablespoons sugar syrup
Making sugar syrup
- In a saucepan, add 100g (1/2 C) sugar to 100 ml (about 1/2 C minus 1 Tbsp) boiling water and stir occasionally till the sugar dissolves on high heat.
- When the water is boiling again, add ½ teaspoon (3ml) lemon juice.
- Reduce the heat to low and simmer for 15 minutes. Leave to cool at room temperature.
- Yield about approximately 160 g (5 – 6 oz.) sugar syrup.
- The lemon juice helps to prevent the fruits from oxidizing and turning brown. It also adds a bit of tartness to the candies.
- It is very simple to personalize your candied fruits recipe. For example, using different spices and flavour like ginger, cinnamon or vanilla etc.; adding crushed toasted nuts into the candies (peanuts, cashew nuts, almonds …); or simply using different types of coating – coconut flakes, toasted sesame seeds, cocoa powder, …
Making the candies
1. Cut the fruits into small cubes. Save up the fruit juice that leaks out while being cut to boil with the fruits later. If you want your candies to have a smooth mouth feel, cut it smaller or blend the fruits up.
2. In a non-stick pan, add the fruits and the sugar, mix evenly and leave it to macerate (like marinade, but instead of meat it’s fruits) for at least an hour. The sugar will draw out the moisture from the fruits and create a lovely fruity syrup.
3. Put the pan on high heat. When the syrup boils in the pan, reduce the heat to medium and keep simmering for about 20 – 30 minutes. If the pan is too dry, you can add some more water, or use the leaked fruit juice earlier.
Boiling the fruits in sugar syrup will make the candies chewier and, bonus, allow you to keep them for a longer time. You can add bottled (or better, fresh) fruit juice to introduce more or enhance the flavour of the candies. Try freshly squeezed orange juice with carrots – orange-flavour candied carrots may sound a bit strange but it is an extremely pleasant snack, and healthy too.
4. After 20 – 30 minutes of simmering, don’t add any more liquid. Stir the fruit mix occasionally to help the liquid evaporate quicker. The syrup will gradually thicken.
5. After 10 – 15 minutes, when the syrup-fruit mixture has thickened considerably, add 1 – 2 tablespoons of your chosen sweetener and stir until the mixture sets almost like a paste. Make sure that you have turned the heat to low at this point, otherwise your fruit mix can burn easily.
Don’t dry out the fruit mixture completely – you want to make chewy candies, not hard candies. The syrup will harden as you leave it to cool down, so take the pan off the heat when the fruit paste still has a little bit of moisture.
6. Put the fruit paste into a bowl and leave it to cool down slightly until you can touch it – but don’t wait any longer, because once the paste has cooled and set, you won’t be able to shape it. Don’t forget to dab your hands with a bit of water so that the candies won’t stick to your hands. Make small candy balls, or any candy shapes that you desire.
7. Finally, coat your candies with your chosen coating. I find that coconut flakes go with almost any flavour.


JOIN US